Ableton Vocoder Tutorial: Create Clear Robotic Vocals Fast
Table of Contents
How to Use Ableton Vocoder: Step-by-Step Setup
Choosing the Best Carrier Sound for Ableton Vocoder
How MIDI Notes Shape Vocoder Harmony
How to Make Ableton Vocoder Vocals Clearer
Ableton Vocoder Not Working? Three Common Problems
Key Takeaways
A vocoder needs two signals: a modulator for the words, rhythm and articulation, and a carrier for the pitch and tonal character.
For the classic robot-voice effect, place Vocoder on the vocal track, select External and use a synthesizer as the carrier.
Choose a bright, harmonically rich carrier, such as a sawtooth wave. A sine wave usually produces a weaker, less intelligible result.
Adjust Bands, Enhance and Unvoiced to make the lyrics clearer without losing that beautifully robotic character.
If your robot starts singing in the wrong key, edit the carrier’s MIDI notes, not the vocal recording.
Ever wondered how artists like Daft Punk create those incredibly cool, futuristic robotic voices that follow a track’s melody without actually hiring a cyborg? One piece of the secret sauce is often a vocoder.
The Ableton Live Vocoder is a built-in audio effect that uses the rhythmic and spectral characteristics of one signal—the modulator—to shape another signal—the carrier. Usually, the modulator is a human voice and the carrier is a synthesizer. The result is a musical robotic vocal effect whose words come from the performance and whose notes come from MIDI.
What Does a Vocoder Do?
Think of a vocoder as a partnership. The modulator supplies the words, rhythm and articulation; the carrier provides the pitch and tonal character.
Ableton Vocoder analyses the vocal through a bank of frequency filters, then applies its changing spectral shape to the carrier. The synthesizer appears to speak, while the MIDI notes determine the melody or harmony.
Unlike pitch correction, which changes the original voice, a vocoder combines it with a separate sound source. Change the carrier and the same vocal recording can become a soft choir, a gritty machine or a toaster with emotional depth.
Please note: Ableton’s native Vocoder is included in Live Standard and Suite, but not Intro or Lite. If your edition does not include it, you will need a third-party alternative such as TAL-Vocoder.
Ableton Vocoder Carrier Modes
The Carrier menu determines which sound the modulator will shape:
Noise uses Vocoder’s internal noise generator for whispery, airy or percussive textures.
External routes another track into the device. Choose this for the classic singing-synth effect.
Modulator uses the vocal itself as the carrier, creating a more unusual resynthesised sound.
Pitch Tracking uses an internal monophonic oscillator that follows the vocal’s pitch.
How to Use Ableton Vocoder: Step-by-Step Setup
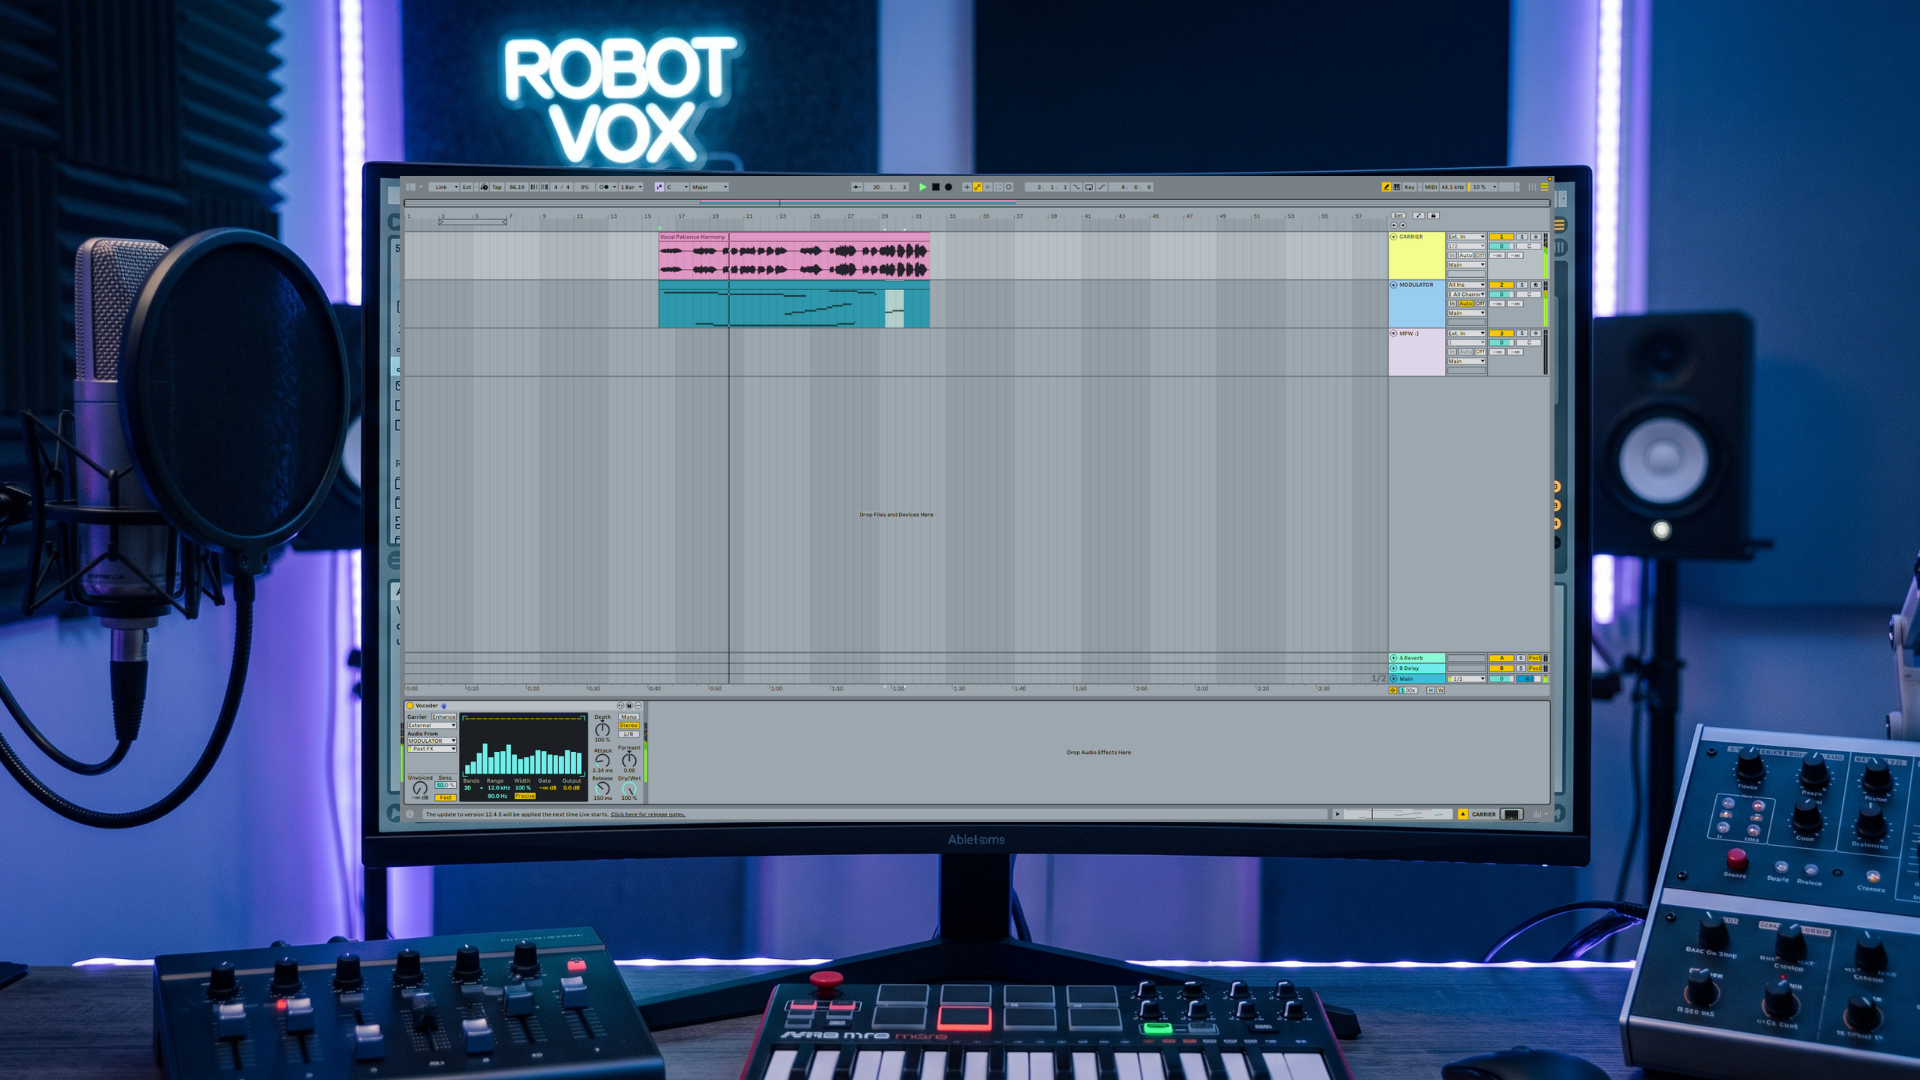
1. Create the Modulator Track
Place your vocal on an audio track and make sure it is recorded in mono. Clear pronunciation, strong consonants and precise timing will make the final effect much easier to understand.
2. Create the Carrier Track
Create a separate MIDI track and load a synthesizer. In our video, we use Drift with a simple sawtooth patch. Add sustained notes or chords that play at the same time as the vocal. Without them, Vocoder has no carrier signal to process, and your robot will remain tragically silent.
3. Place Vocoder on the Vocal Track
Find Vocoder under Audio Effects and drag it onto the vocal track, not the synth track. Remember: the vocal is the modulator, so this is where Vocoder belongs.
4. Select an External Carrier
Open the Carrier menu inside Vocoder and choose External. This tells the device to use the synth as a separate carrier.
5. Route the Synth into Vocoder
Under Audio From, select your synth track. In the second menu, choose Post FX so Vocoder also receives any effects placed on the carrier track.
6. Hear the Vocoded Signal
Set Dry/Wet to 100% to hear only the processed effect.
If you can also hear the original synth, solo the vocal track. Live will mute the synth’s direct output while continuing to feed it into Vocoder behind the scenes. Sneaky, but useful.
Before You Panic: Do not deactivate the synth track or stop its MIDI clip. Vocoder desperately needs that carrier signal to keep your robot alive.
Choosing the Best Carrier Sound for Ableton Vocoder
The carrier gives the effect its musical personality. A soft pad creates floating backing vocals, while an aggressive bass makes the same words sound gritty and mechanical.
Start with a harmonically rich sawtooth wave, which gives Vocoder plenty of frequency information to shape. A sine wave contains very little harmonic content, so it usually produces a weaker and less intelligible result.
Use sustained MIDI notes so the carrier lasts through each word. If the result feels dull, open the synth filter or add gentle unison or chorus before Vocoder.
How MIDI Notes Shape Vocoder Harmony
The carrier’s MIDI controls the harmony, register and rhythm of the effect. Major chords can feel bright and euphoric, while minor chords sound darker and more cinematic.
Copy your main chord progression onto the carrier track, then simplify the voicing if the result feels crowded.
Use long notes for smooth robotic vocals, short notes for rhythmic pulses and rests for dramatic gaps. The MIDI clip determines both which notes the robot sings and when the carrier is available.
How to Make Ableton Vocoder Vocals Clearer
Everything is routed, but your robot is still mumbling inside a cardboard box? Adjust these three Ableton Vocoder controls before reaching for an EQ.
Bands: Control the Detail
Fewer bands sound rougher and more synthetic. More bands improve vocal detail and intelligibility. Maximum is not always better, so balance clarity and robotic character.
Enhance: Add Brightness
Enhance normalises the carrier’s spectrum and dynamics, creating a brighter, clearer sound. Compare it on and off.
Unvoiced: Clarify Consonants
Unvoiced adds noise to pitchless consonants such as “S” and “F”, making words easier to understand. Increase it gradually.

Ableton Vocoder Not Working? Three Common Problems
1. The Vocoder Sounds Weak or Silent
Make sure the synth plays MIDI notes at the same time as the vocal and that the correct carrier track is selected under Audio From.
If the result is weak, replace a sine wave with a bright sawtooth wave or a harmonically rich string patch. The more useful frequency information the carrier contains, the more material Vocoder has to shape.
2. The Words Are Difficult to Understand
Vocoder mirrors the original performance. If the vocal is mumbled or loosely timed, the processed version will be unclear too.
Pronounce the consonants deliberately, keep the timing precise and then adjust Bands, Enhance and Unvoiced.
3. The Vocoder Sounds Out of Key
Remember the golden rule: the vocal provides the words, but the synthesizer provides the pitch.
Open the carrier’s MIDI clip and move the notes into the correct key. You do not need to sing the part again.
Final Thoughts on Ableton Live Vocoder
Ableton Vocoder works best when both signals do their job: a clear vocal supplies the articulation, while a bright carrier and intentional MIDI notes provide the tone and harmony.
Start with one mono vocal, a sawtooth wave and sustained chords. Use Bands, Enhance and Unvoiced to balance clarity with robotic character, then change the carrier or MIDI progression to make the effect completely your own.
Want to Start Producing But Not Sure Where to Start?

FAQ
Reference List
Ableton. Live Audio Effect Reference: Vocoder.
Ableton. Harmonic Sound Design with Live’s Vocoder.
Ableton. Live Instrument Reference: Drift.
Togu Audio Line. TAL‑Vocoder.