Ableton Live 13: New Features and Workflow Improvements
Table of Contents
What's New in Ableton Live 13?
1. Ableton Live 13: An Overview
3. Other Improvements Worth Knowing About
Key Takeaways
Release date: Beta opened November 10, with the full release scheduled for February 2027.
Big workflow wins: A dedicated Step Sequencer, MIDI lanes, inline preset browsing and Ableton Link sync to arrangement.
New devices: A consolidated Drum Synth, Transient Shaper, Multiband Rack, Clipper, Looplet and one-knob audio effects like Drum Shaper.
ARA support: An intro version of Melodyne is included, plus compatibility with other ARA plugins.
Design refresh: A redesigned interface for smoother navigation, especially in the browser and device view.
Upgrade offer: Buy or upgrade to any edition of Live 12 before release and get the same edition of Live 13 free, while Live 12 Suite owners can pre-order Live 13 Suite at 20% off.
What's New in Ableton Live 13?
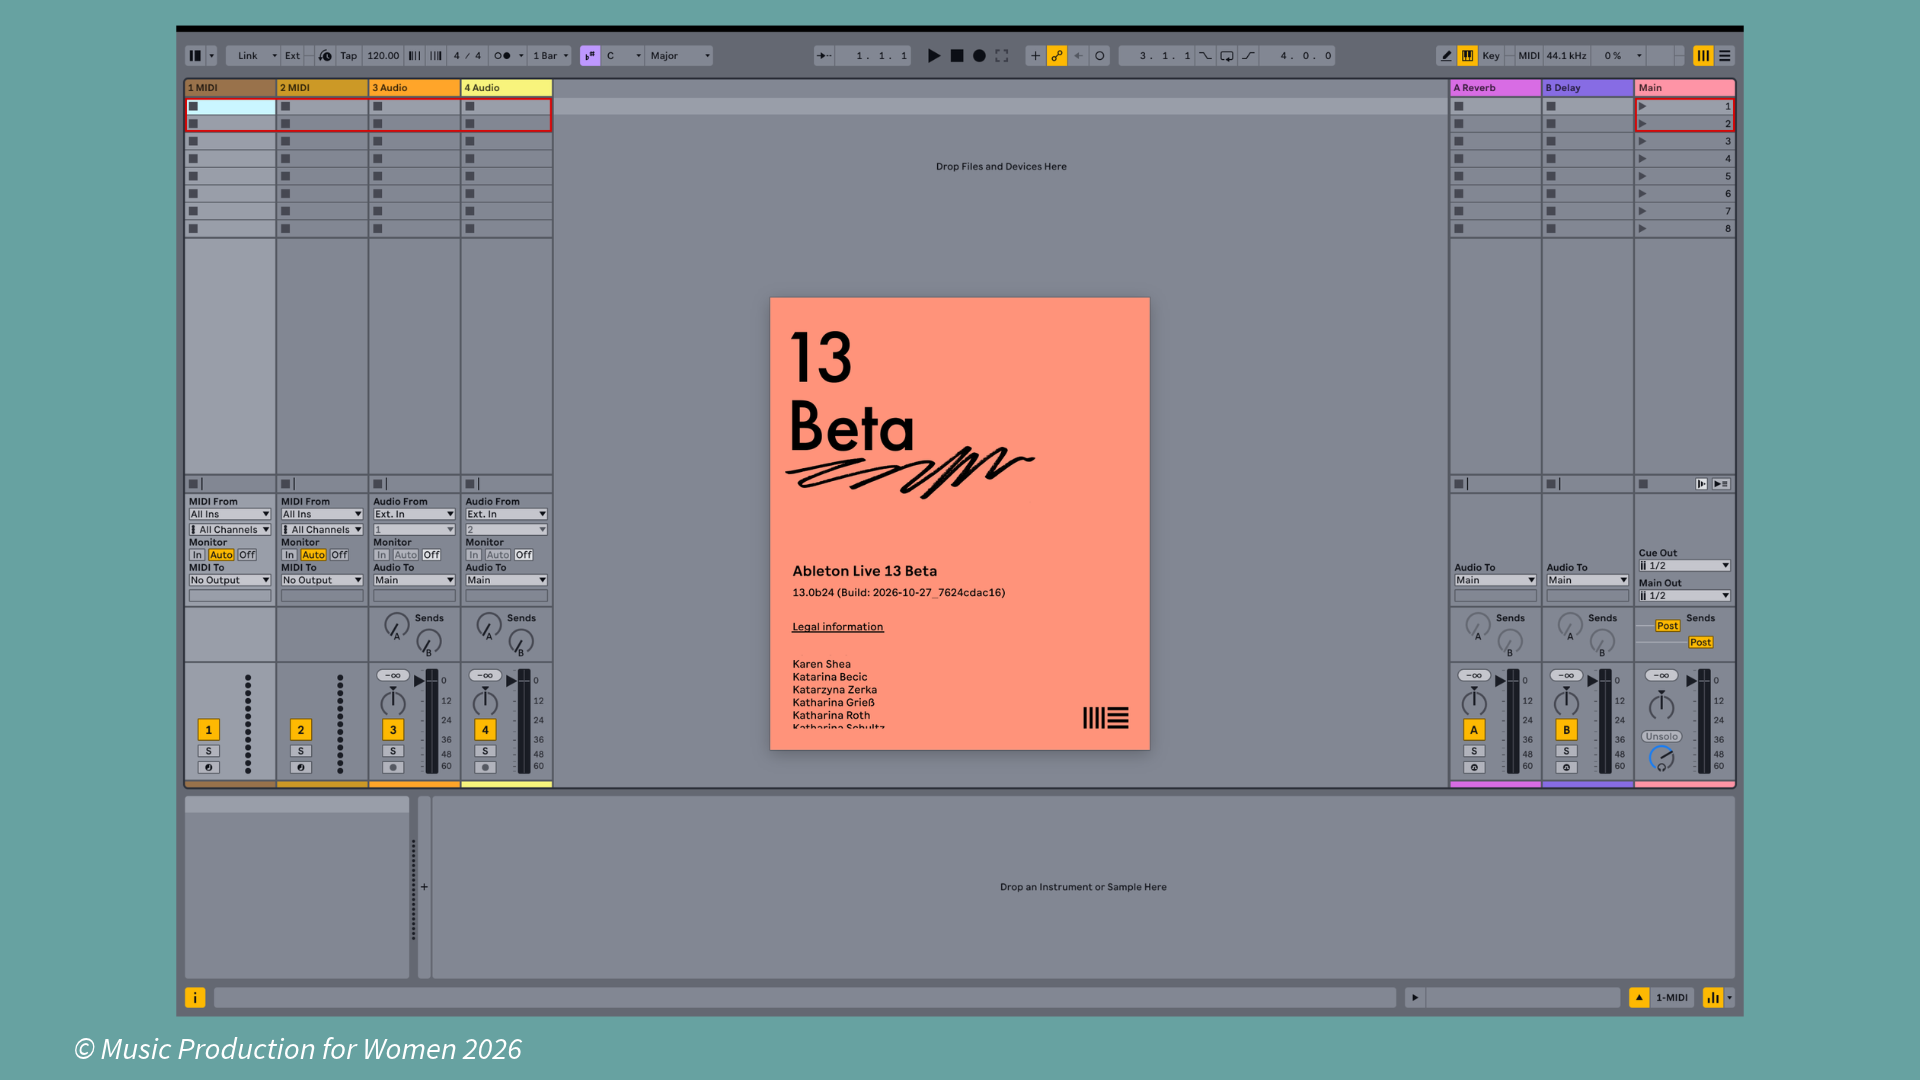
We've all been waiting for it. It’s been a long 3 years, and Ableton Live 13 finally arrives with a mix of practical improvements and exciting new tools. The beta opened on November 10th, with the full release scheduled for February 2027.
This isn't just a patch or a minor update: it's a substantial refresh that touches on sound design, mixing, performance and workflow. Whether you're producing in the studio or performing live, there's something here that could make your process smoother and more creative.
Let's dive into what's changed, why it matters and how you might use these features in your own music-making.
1. Ableton Live 13: An Overview
Live 13 represents a thoughtful evolution of the DAW. The focus is on consolidating tools, reducing friction and giving users more control without overwhelming them. The interface has some thoughtful design updates for better navigation, the browser is smarter and there's a strong emphasis on features that bridge production and performance.
The update also reflects community feedback, the team has listened to requests for things like MIDI lanes, improved step sequencing and better integration with external plugins, so you can hopefully see your suggestions being put into practice with this new update!
2. The Main New Features
Drum Synth: A More Practical Approach to Percussive Synthesis
What it is: Ableton's Drum Synth devices (previously DS Kick, DS Snare, etc.) are Max for Live instruments that generate percussion through synthesis. In Live 13, they've been consolidated into a single device with multiple models.
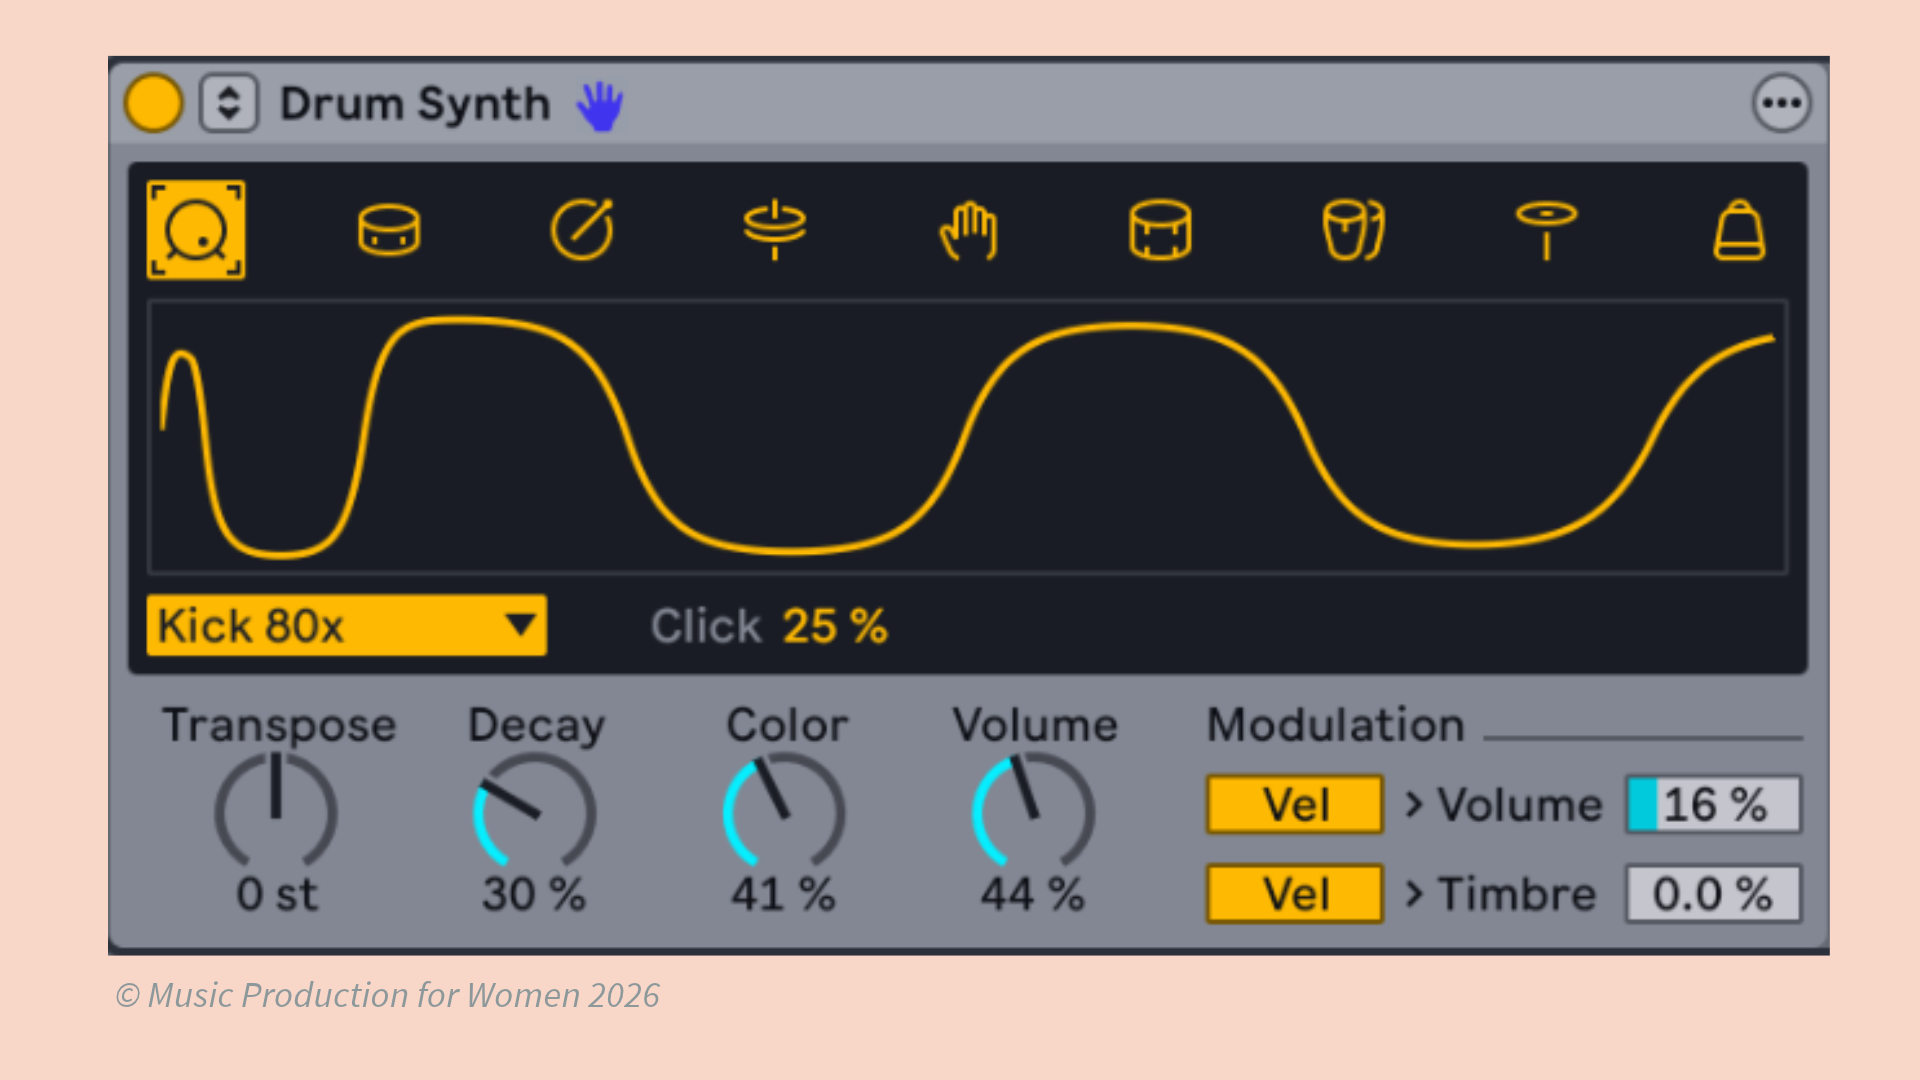
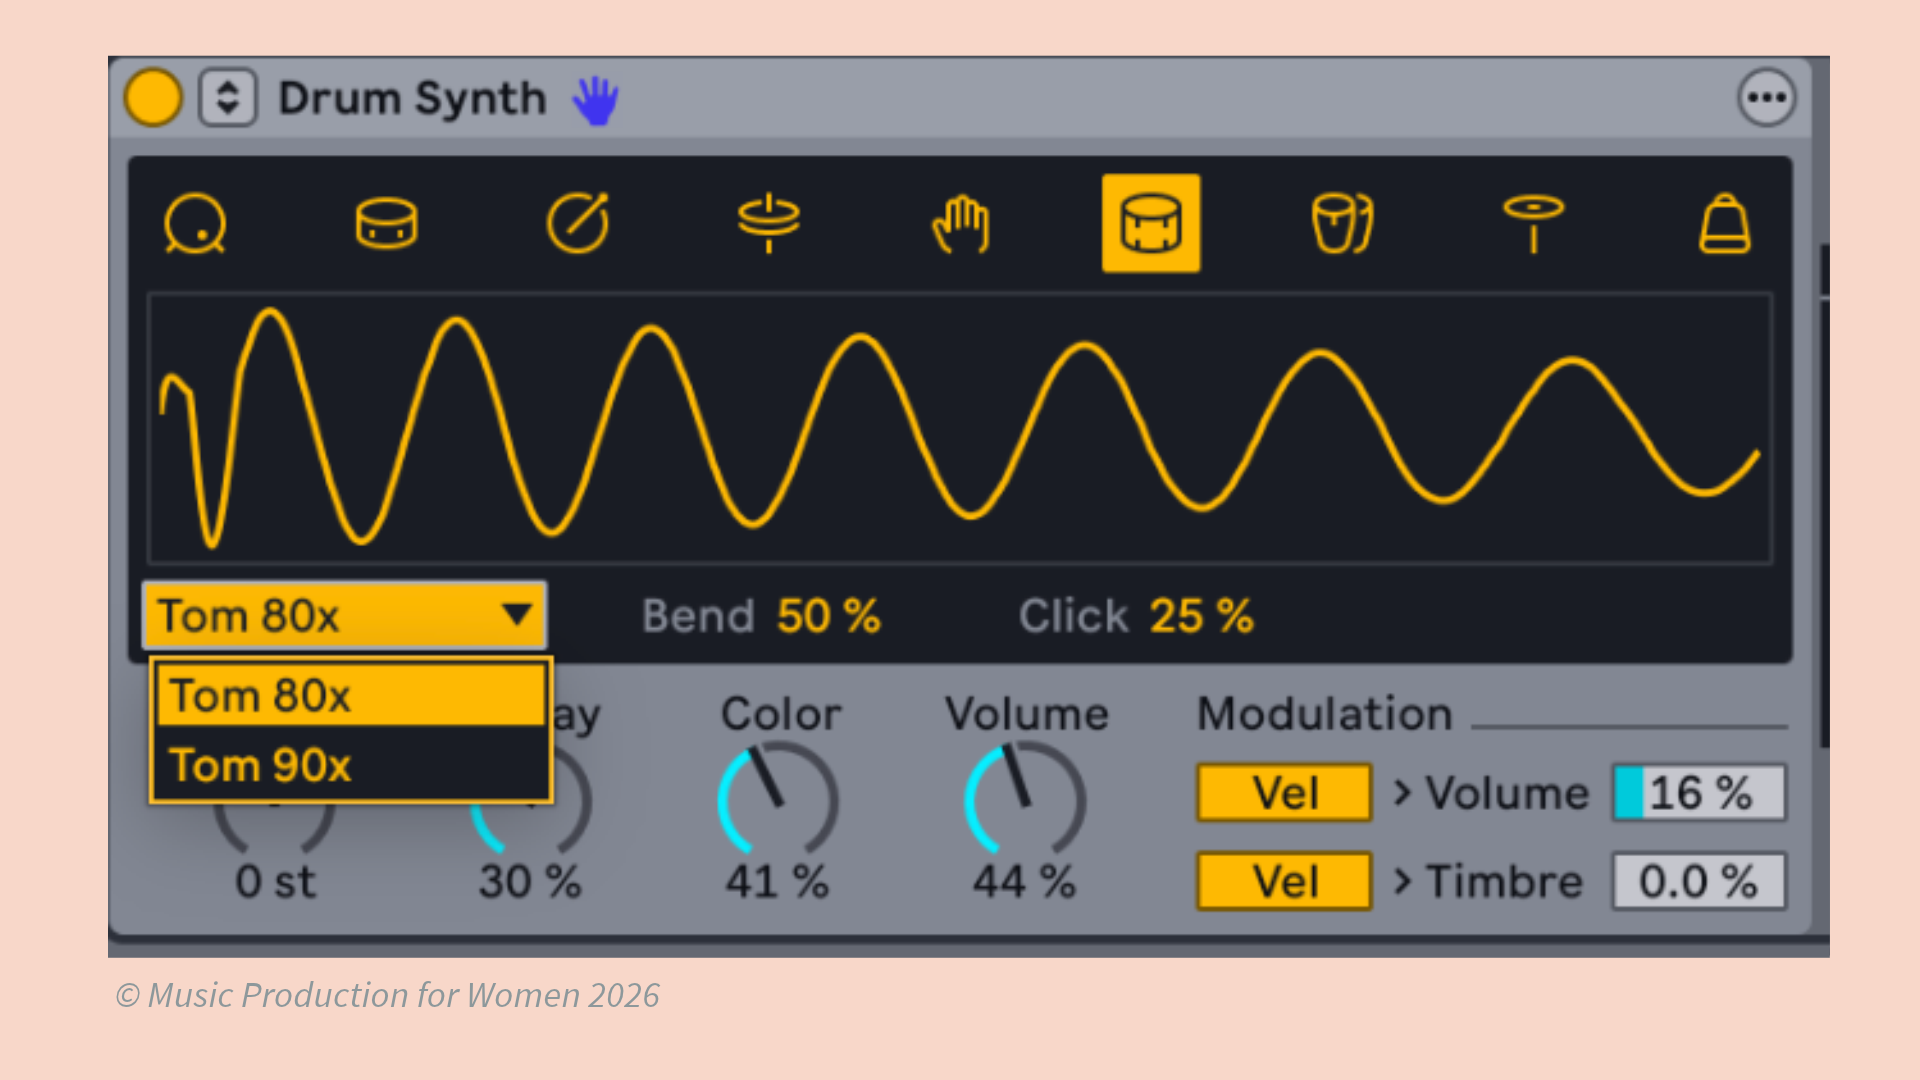
What's changed: Previously you'd need to load each drum synth individually into a Drum Rack. Now the device comes with a drop-down menu containing all the custom DS sounds, including kicks, snares, hi-hats, claps and some wackier FM synth options like the marbles preset.
How it works: Select a model from the drop-down, and the parameters below change to match that specific sound. For example, in Kicks you'll see decay, colour, attack and bend controls.
Why it's useful: Instead of spending time building your own drum kit from individual devices, you can load the consolidated Drum Synth and choose sounds as needed. It's faster to set up and still gives you full control over each element when you need it.
Step Sequencer: A New Way to Program Drums and Melodies
What it is: A step sequencer lets you build repeating patterns by placing sounds on a grid, one step at a time. Think of programming a beat on a drum machine: you usually have 16 steps per track and you can turn each step on or off to build your kick, snare, and hi-hat patterns.
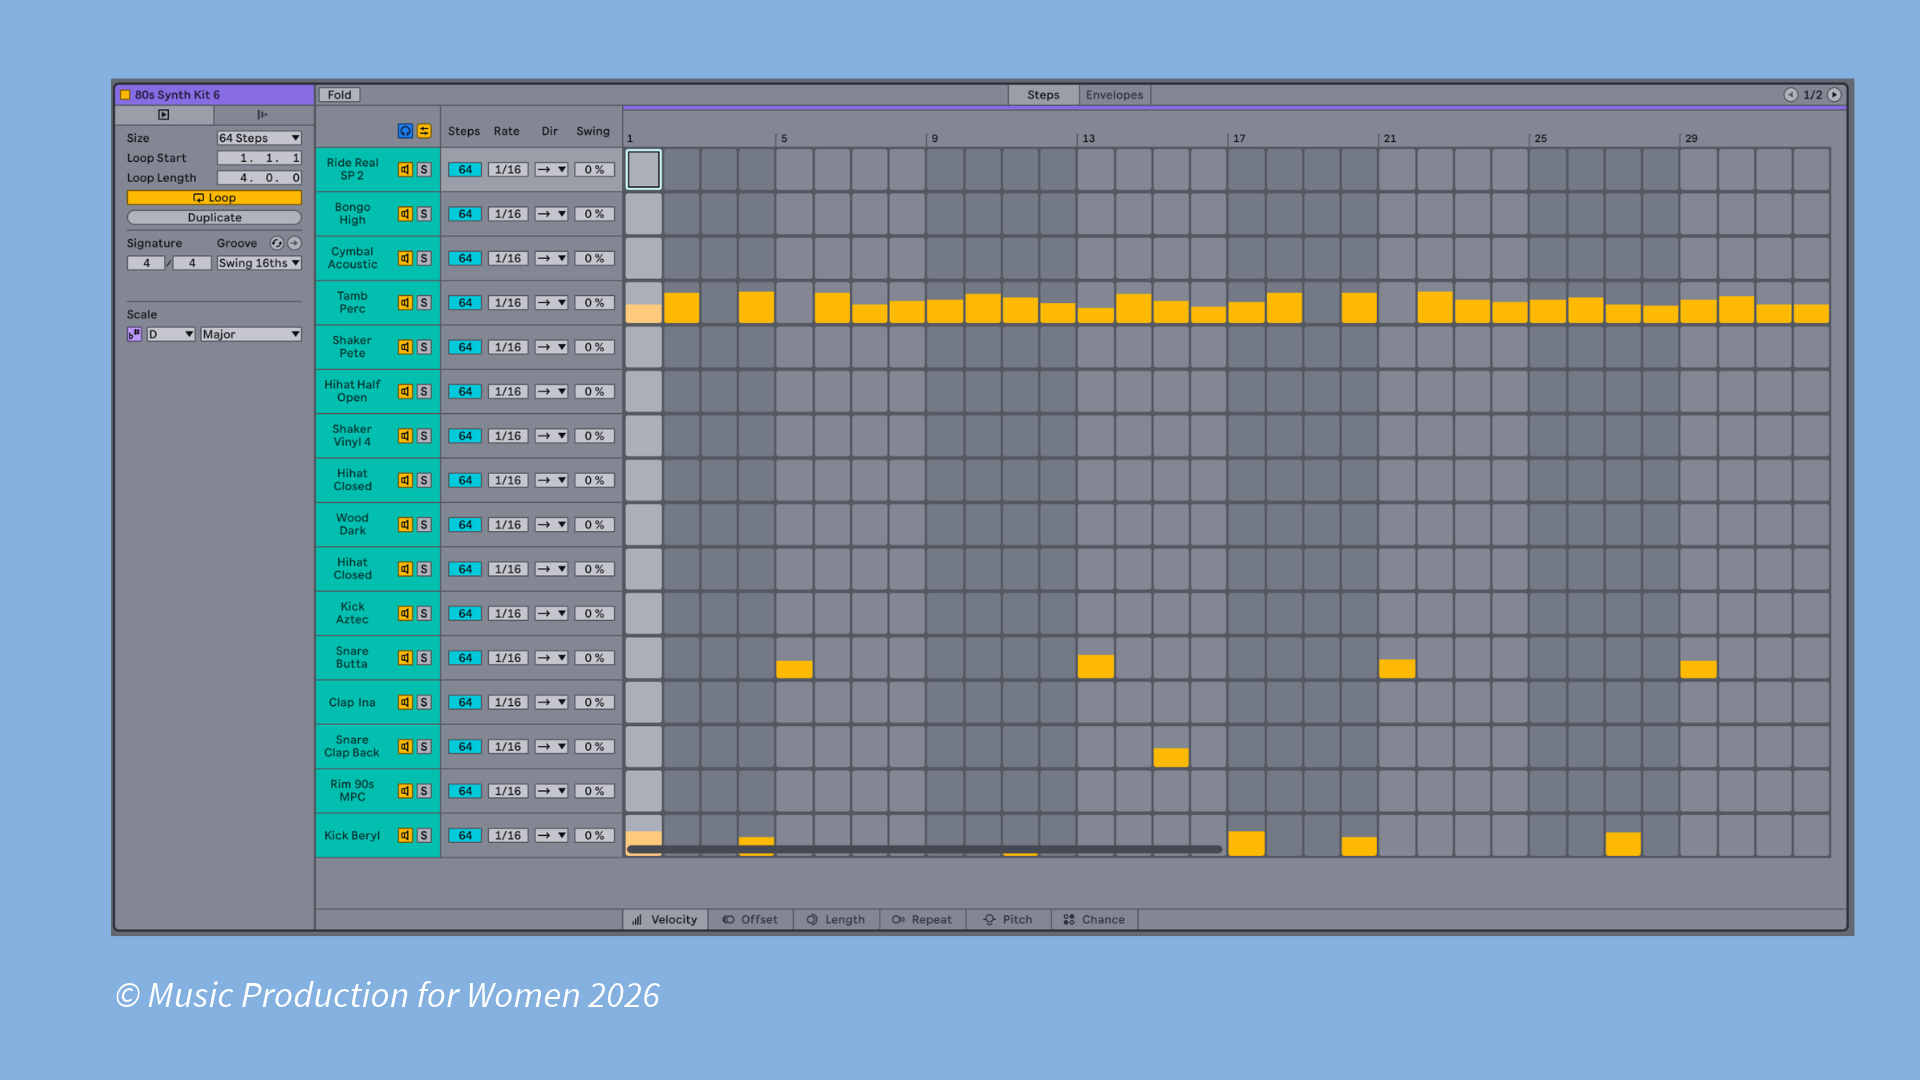
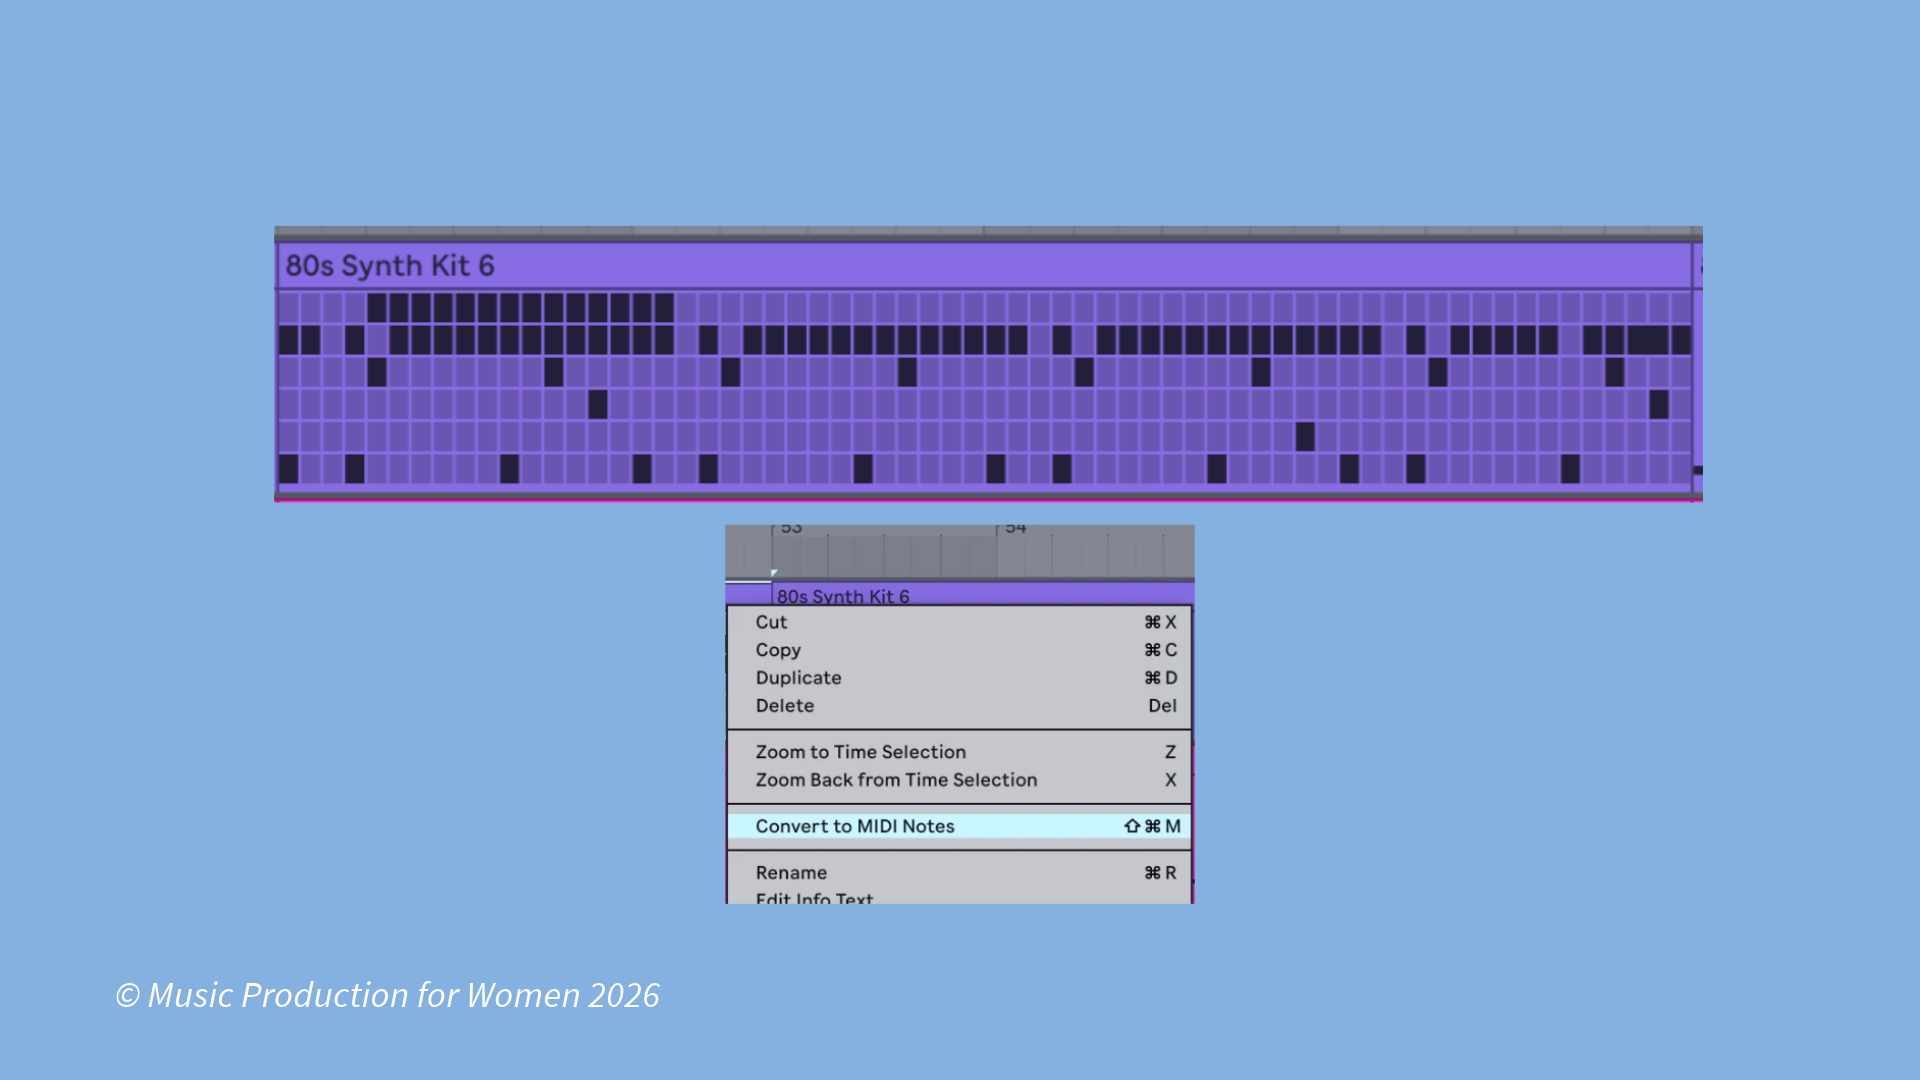
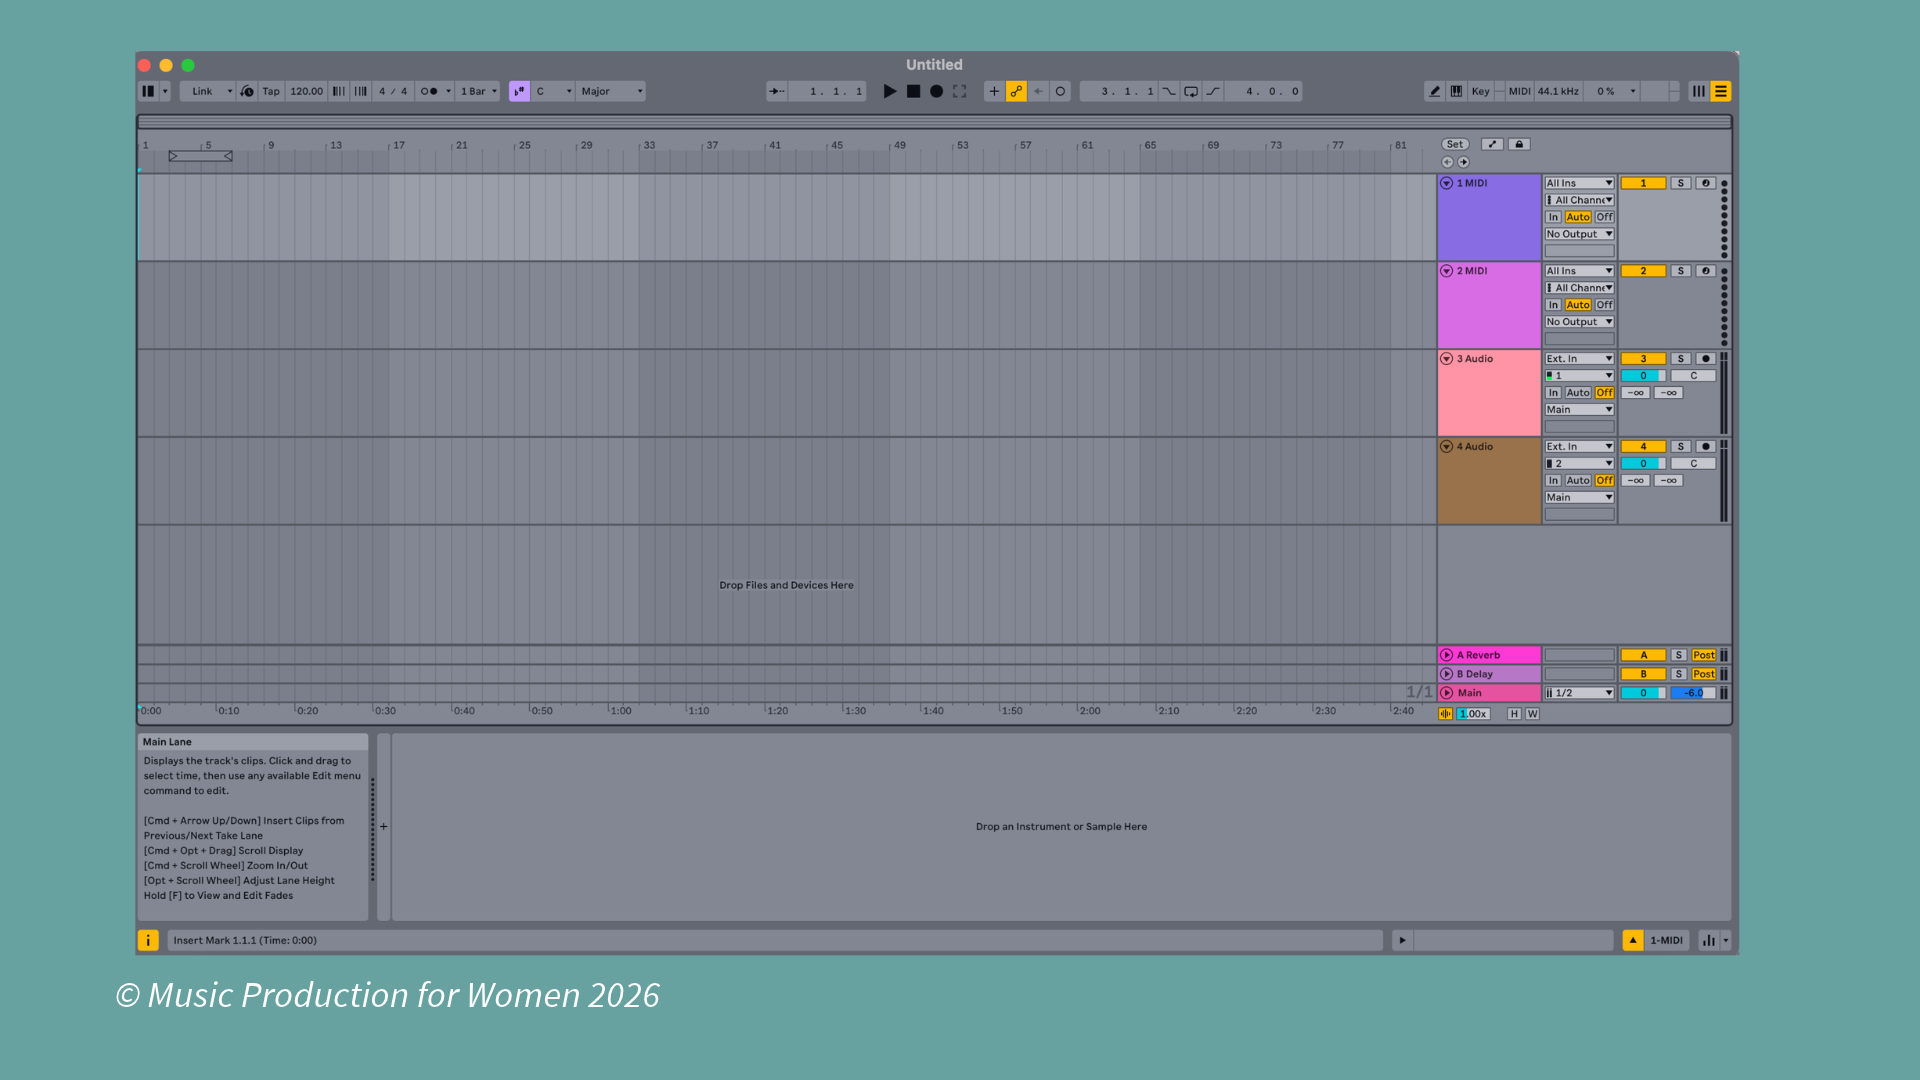
What's changed: Live 13 introduces a dedicated step sequencer view for clips, which is a game-changer especially for users coming from DAWs like GarageBand and FL Studio. You can now create step sequencer clips directly on a blank MIDI track or arrangement area switching mode via the dropdown menu.
How it works:
Create a step sequencer clip and you'll see lanes for each instrument or note.
Toggle steps on/off to build your pattern.
You can convert back and forth between step sequencer clips and MIDI note clips (Piano Roll).
Apply grooves to individual lanes rather than the entire clip.
Reverse groove direction mathematically (put it in the opposite direction of the groove).
Why it's useful: This is huge for producers who think in patterns rather than individual notes. You can program complex beats or melodic hooks without getting lost in the Piano Roll. The ability to apply groove per lane means you can swing just the snares and still keep the kick tightly on-grid.
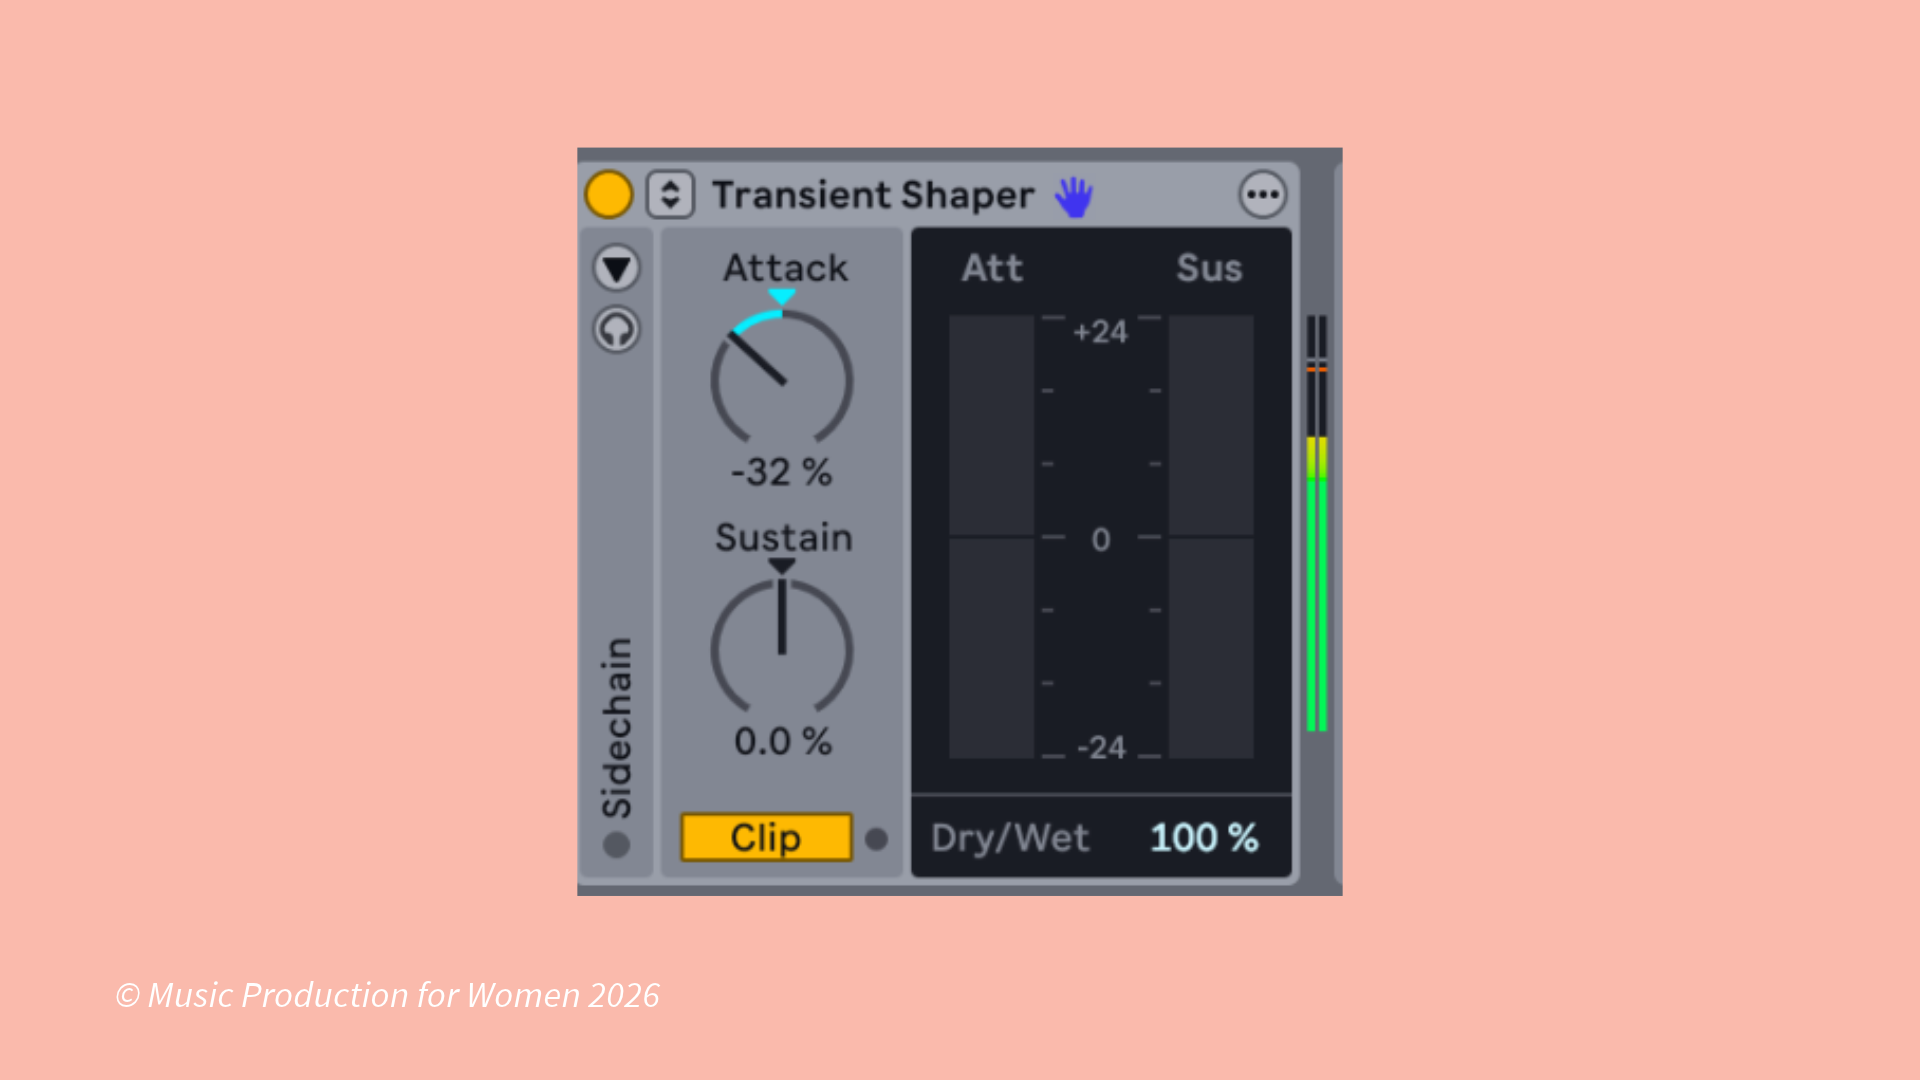
Transient Shaper: Punch and Clarity in One Device
What it is: A transient shaper lets you adjust the attack and sustain of a sound.
What's changed: This is one of several new stock devices in Live 13, bringing an exciting new addition to the audio effects available from Ableton. Unlike some transient shapers that only boost attack, this one can both boost and reduce either parameter.
How it works: Adjust the Attack slider to emphasise or soften transients, and the Sustain slider to control how long the tail lasts. There's also a side-chain mode where you can use transient information from another clip or channel to shape the transient of your sound.
Why it's useful: A transient shaper helps you add punch, soften harsh attacks and control how tight or sustained a sound feels. It’s especially useful on drums to help them stand out, reduce ringing tails or bring out more body and room ambience.
Practical example: Your snare sounds too sharp and is fighting with the hi-hats. Turn on Transient Shaper, reduce the Attack slightly to soften the click, and increase Sustain a bit to add more body.
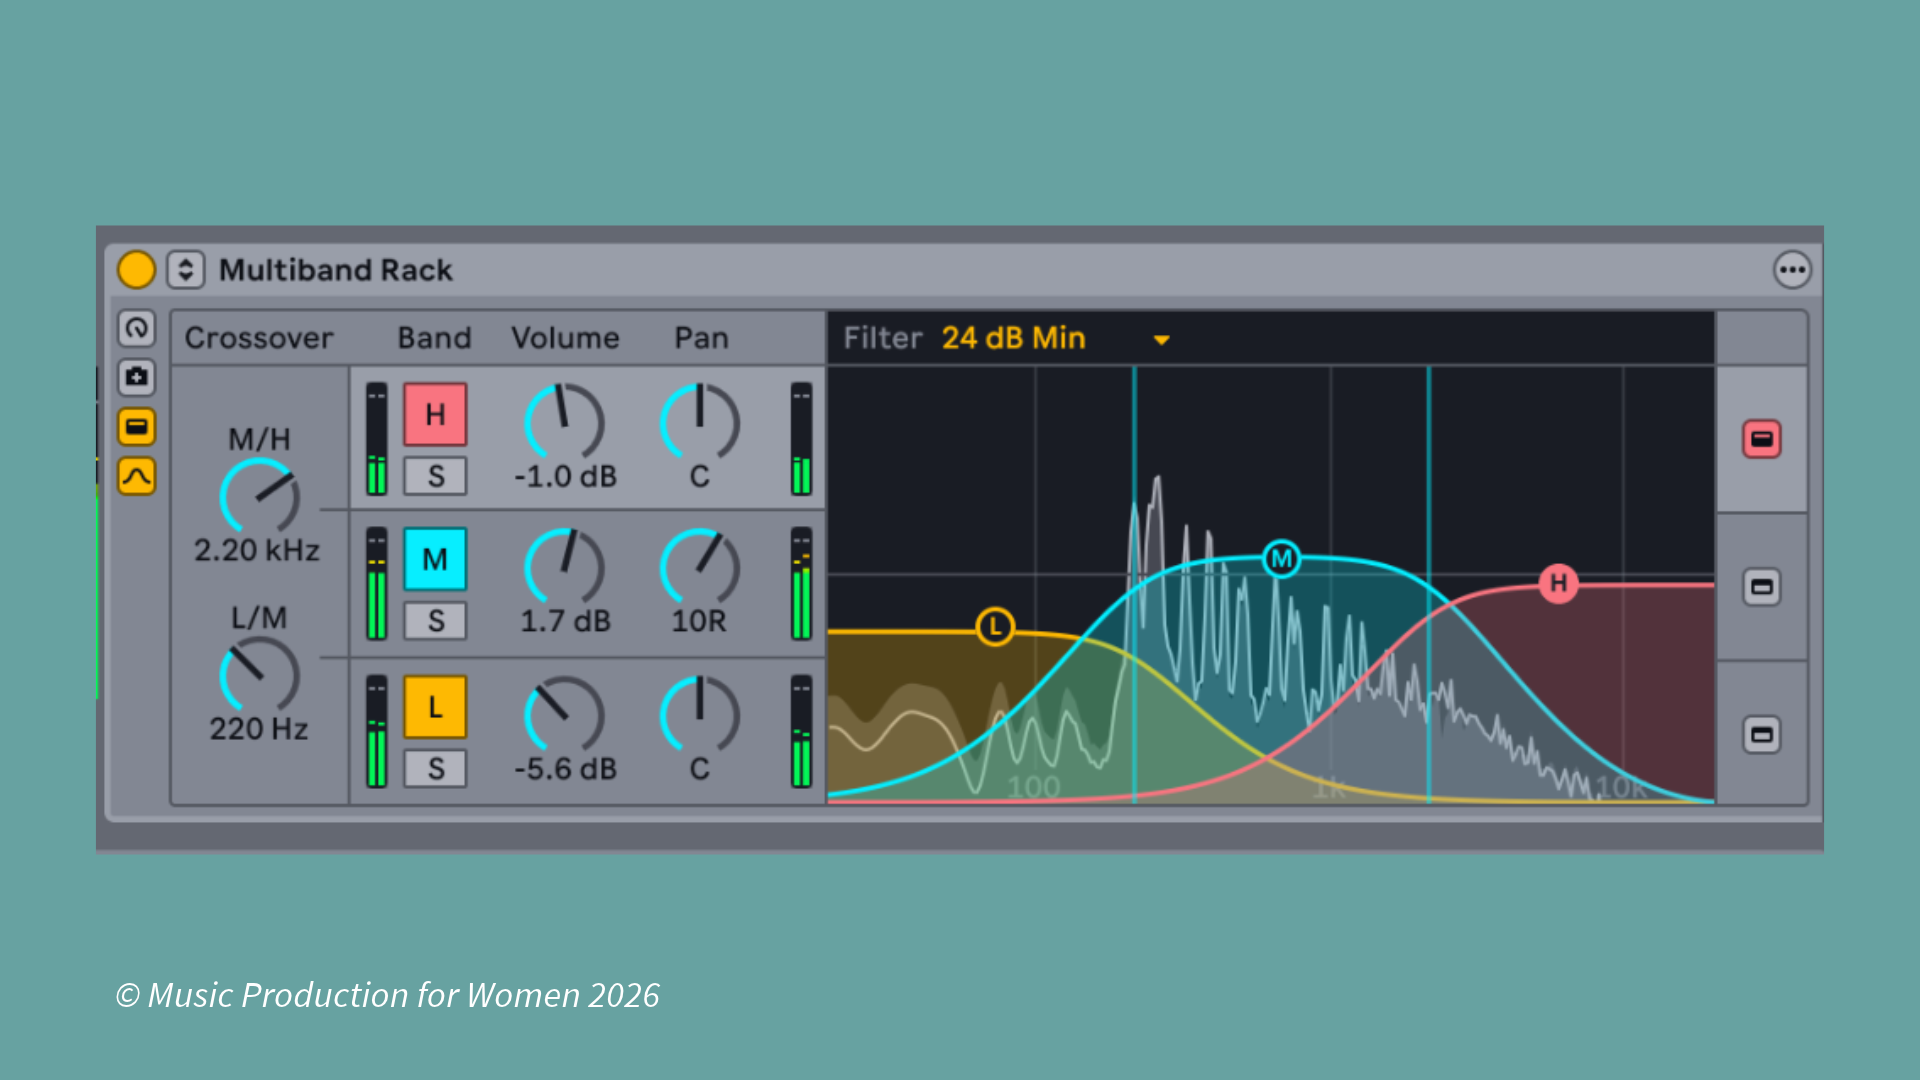
Multiband Rack: Frequency-Specific Processing
What it is: A multiband effect rack that lets you apply separate effect chains to different frequency ranges of your audio.
What's changed: This is another brand new stock device in Live 13. Previously, people would try to hack this by splitting signals with filters and routing them through separate effect chains.
How it works: The device splits the signal into three frequency bands (low, mid, high), each with its own effect chain. You can host different effects in each band, for example, beat repeats on all three bands plus a delay only on the highs. You can also convert it to two bands if you prefer.
Why it's useful: This plugin provides targeted processing without phase issues. You can add movement and texture to the mids and highs while keeping the low end clean and focused. The built-in filter models (including linear phase) are designed to minimise or eliminate phase problems that used to occur with manual workarounds.
Practical example: You're working on a vocal track and want to add some tape saturation only to the mid frequencies while keeping the lows clean for clarity. Load your vocal into a Multiband Effect Rack, add tape saturation to the mid band and leave the lows untouched.
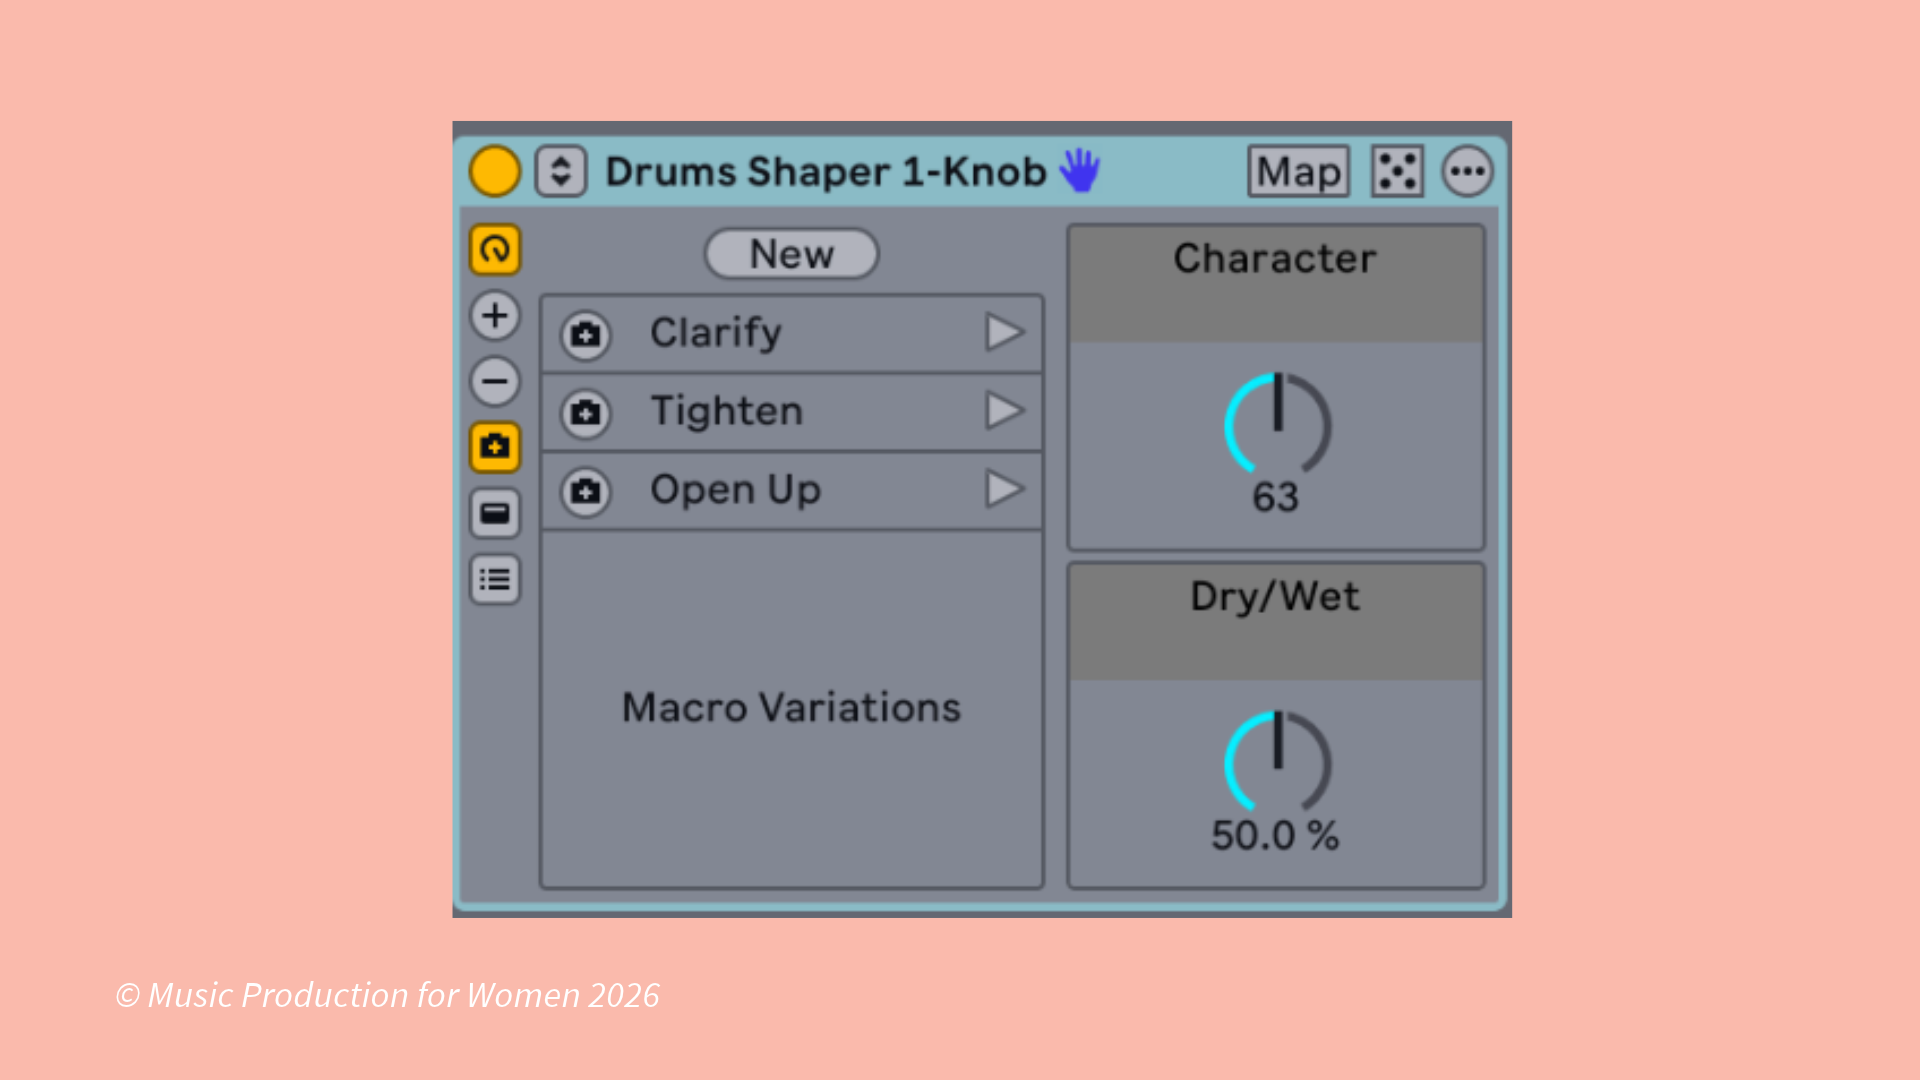
One-Knob Pre-Made Audio Effect: Quick and Clean Processing
What it is: A collection of one-knob audio effect racks designed by Ableton's sound team. It currently includes Drum Shaper and Transient Shaper, with more to come.
How it works: Each rack has a single knob that controls the main parameter, but underneath there's already a well-designed chain of effects. Turn the knob and you get to hear the effect in action straight away.
Why it's useful: It's a handy option when you’ve just started learning production and simply want to get a good sound going quickly without programming everything from scratch. The sounds are designed by audio professionals, so they tend to sound clean and musical out of the box.
Practical example: You've just started learning beat-making and you’re working on a great idea but you don't want to spend hours trying to learn compression, EQ and saturation before you get a good sound. Load the Drum Shaper one-knob rack, turn up the knob a bit and you've got punchy, professional-sounding drums within seconds.
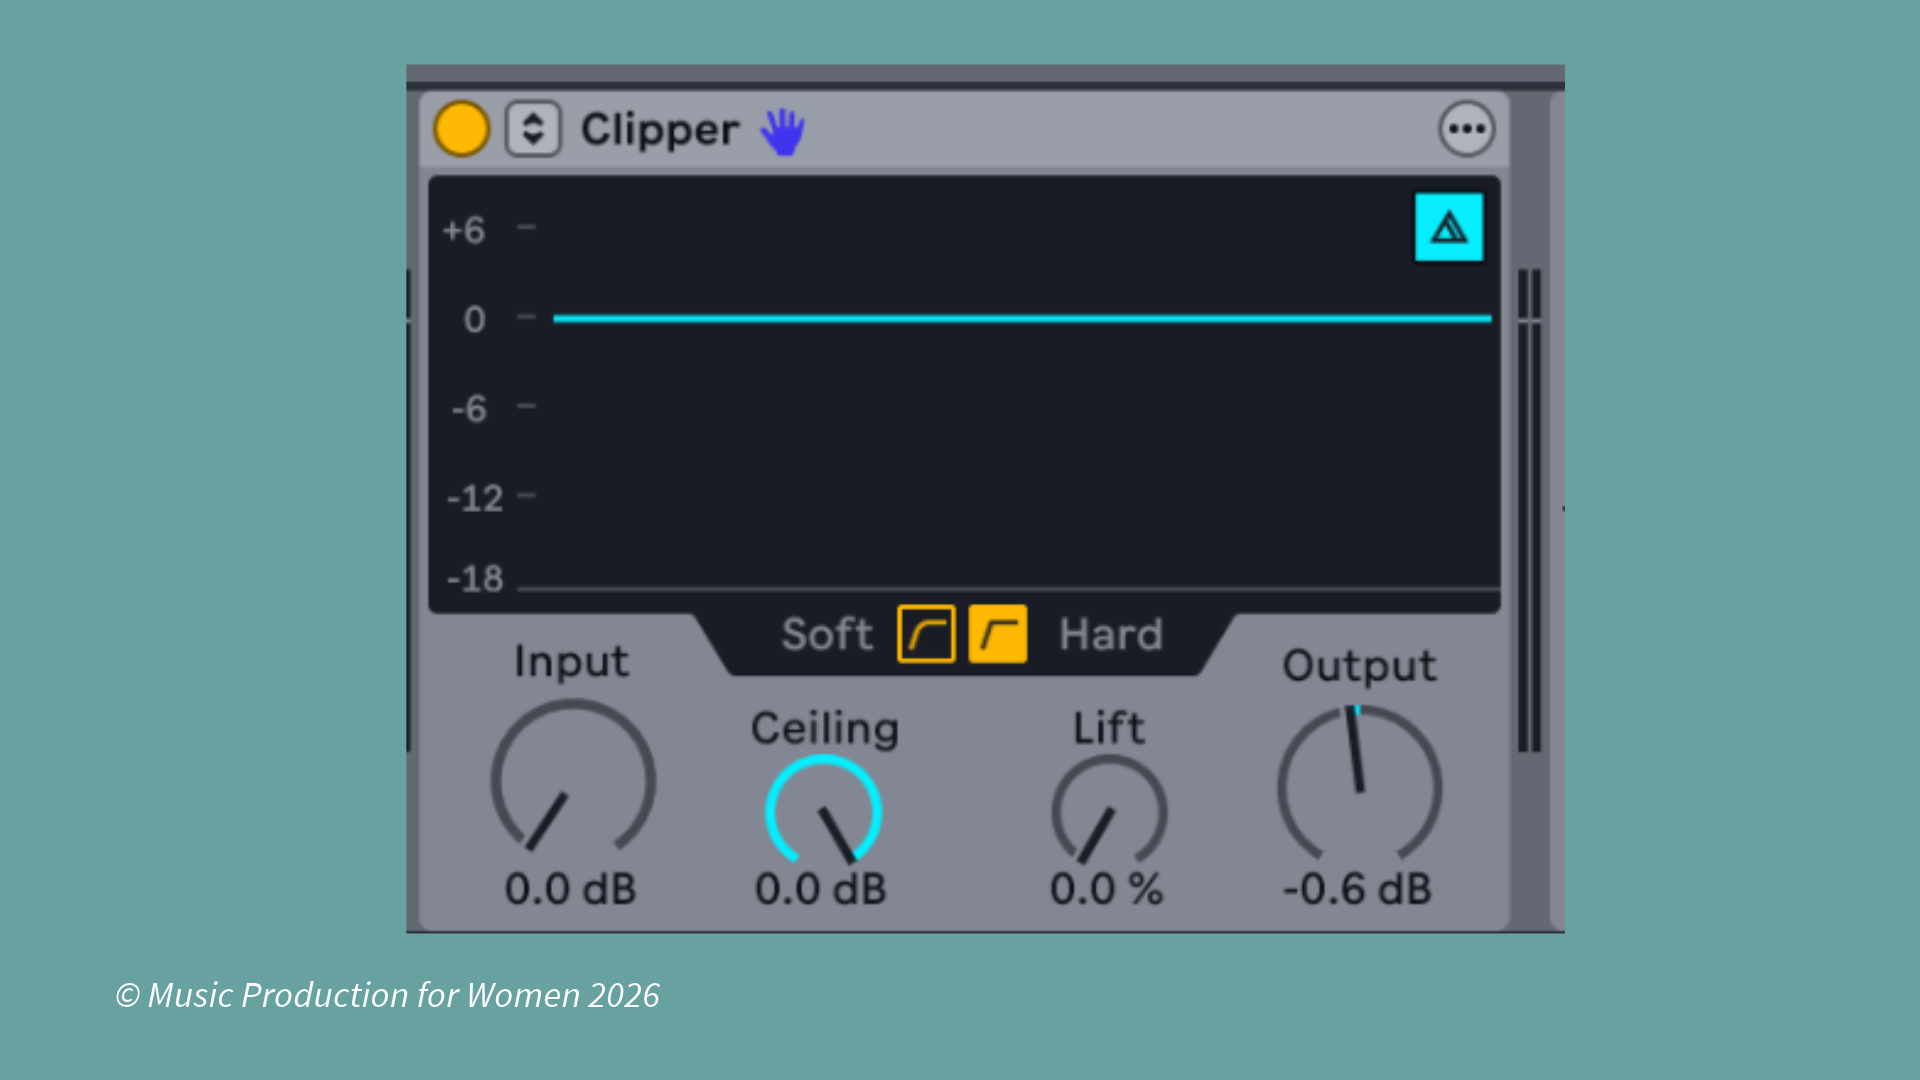
Clipper: Native Peak Control for the First Time
What it is: A native clipper device that clips peaks on an audio signal. This is the first time Live has included a dedicated clipper as a stock device.
What's changed: Previously you'd need to use third-party plugins or workarounds like limiting with multiple compressors.
How it works: Choose between soft and hard clipping, and adjust the threshold to set where clipping begins. There's also a Lift parameter that raises quieter volumes while keeping the peaks clipped, which can give you more headroom and a fuller sound.
Why it's useful: Clipping is an effective way to control peaks without the pumping and artefacts that aggressive limiting can introduce. The delta switch lets you isolate clipping artefacts as a separate signal, which can be used creatively as an effect.
Practical example: Your vocal track is clipping in the mix and you don't want to introduce pumping from a limiter. Load the Clipper, set it to soft clip and adjust until you're getting a warm, saturated sound without distortion.
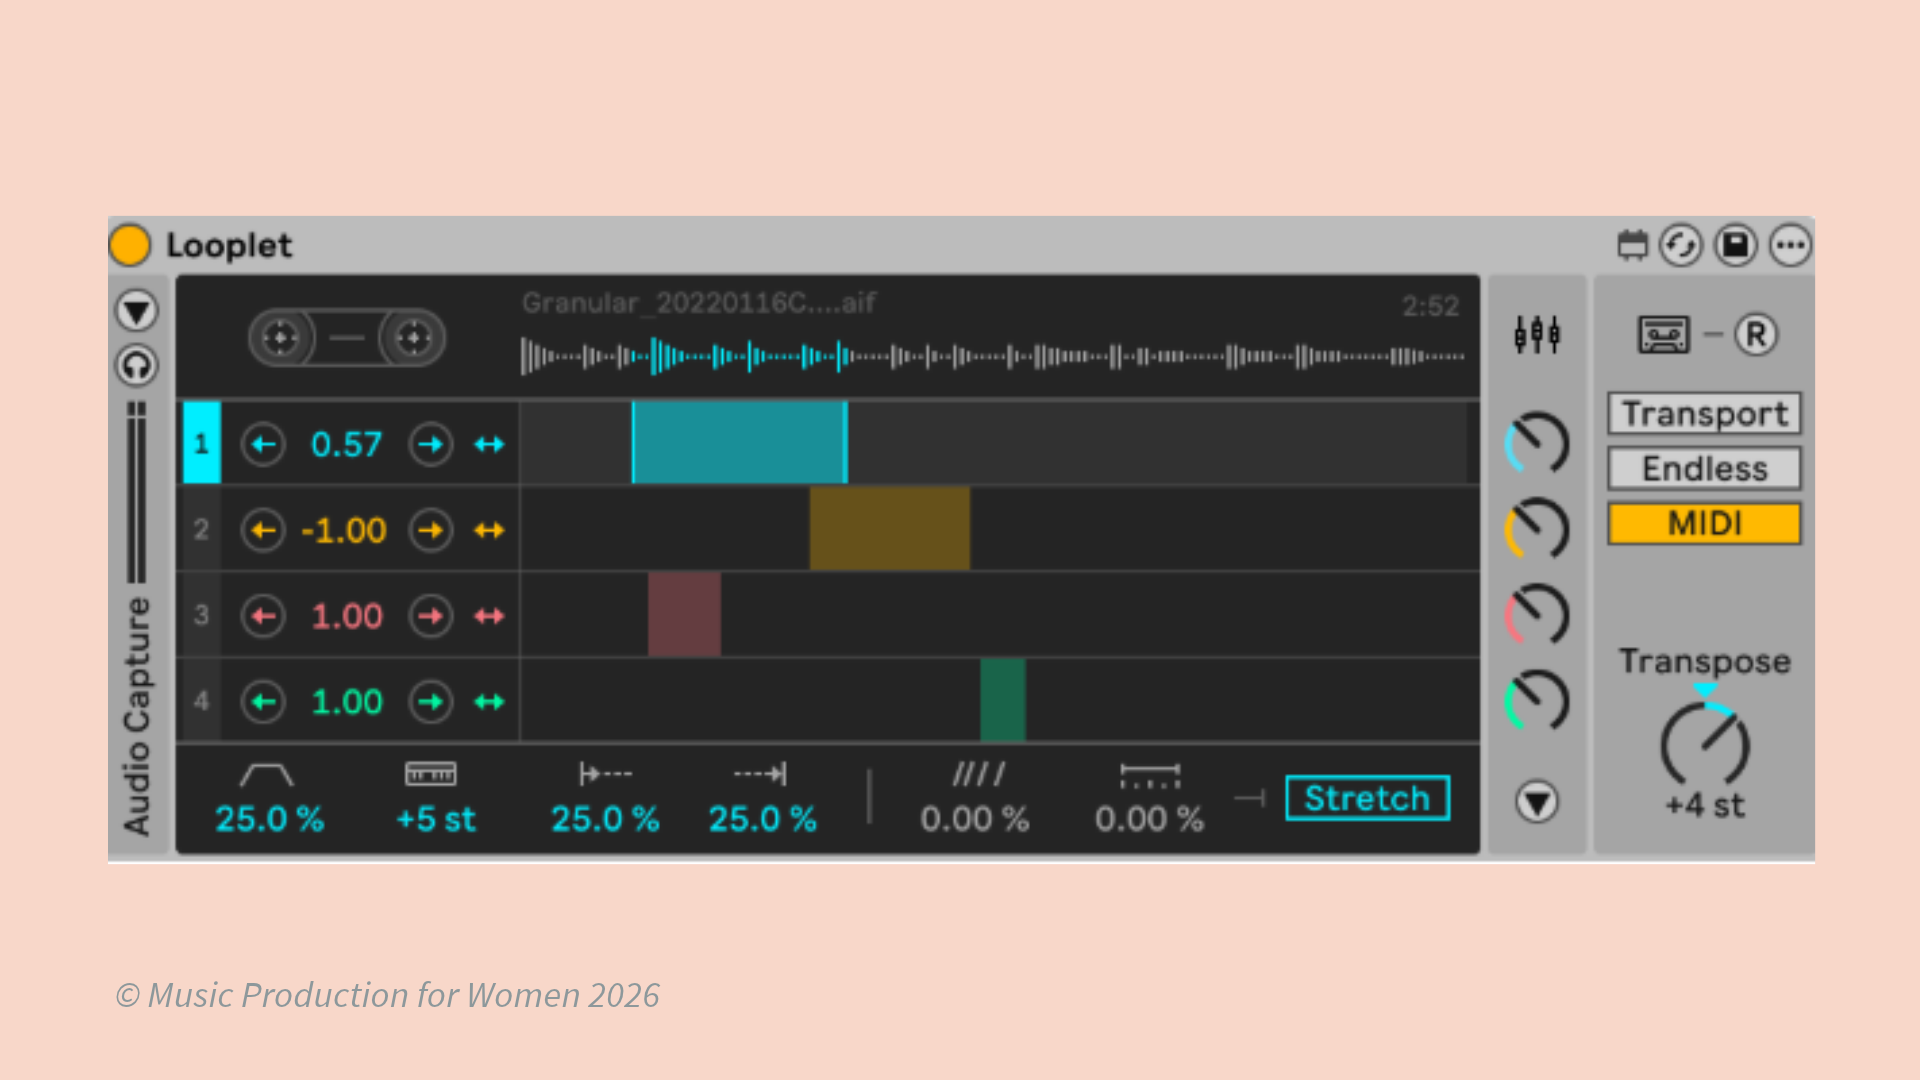
Looplet: 4-Track Tape Looper Built into Live
What it is: A tape-style looper device with four independent tracks, inspired by classic loopers like the Boss RC-20 or Akai MPC.
What's changed: This is a brand new Looper device unlike anything you’ve seen in another DAW before.
How it works: Drag a sample into Looplet and select the sections of it you want to use, then play them in any combination. You can change playback direction (forward/reverse), transpose the whole loop, adjust individual track speeds and pan them independently. There's also a tape stop effect that wasn't available in Live before.
Why it's useful: It's a creative playground for sound design and composition. You can build layers, experiment with tape effects and create evolving textures without leaving Live.
Practical example: You've recorded a vocal take but want to experiment with different rhythmic variations. Load the Looplet, record your vocal on track 1, then play around with the sections of your recording using reversed versions, pitched-up fragments and filtered effects on different sections.
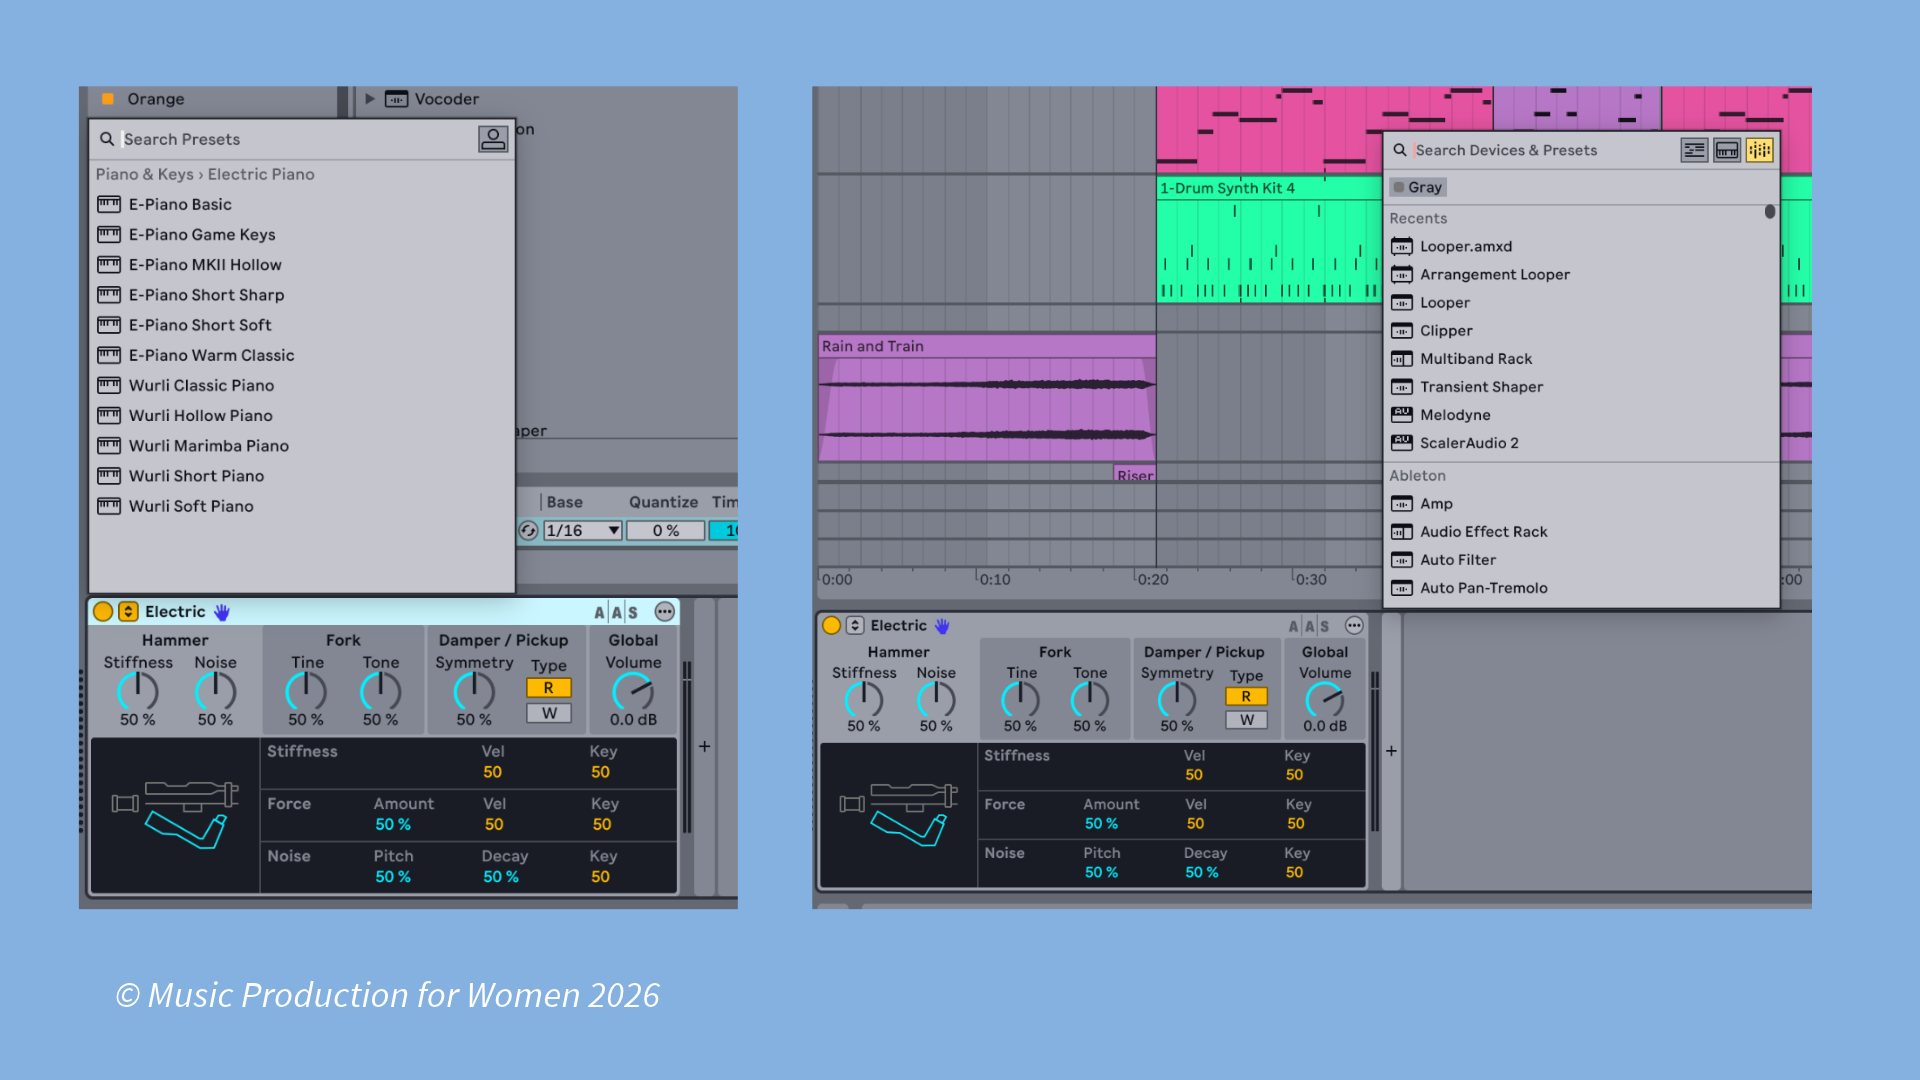
Inline Browsing: Hot-Swap Presets Without Leaving Your Chain
What it is: A new way to browse and swap presets on devices without leaving the device chain or opening the rack.
What's changed: Previously you'd have to open a device, browse presets and then close it again. Now you can scroll through options while the signal is flowing.
How it works: Press Enter on a device to open its preset browser, scroll with the arrow keys or mouse wheel, and press Enter again to apply. You can also add devices inline using the Plus button (hold Command + Left/Right arrow to reorder).
Why it's useful: It speeds up the creative process. You can experiment with different delays, reverbs or effects without breaking your flow. Works in both Device View and Mix View.
Practical example: You're building a reverb tail on your vocal and can't decide between the two presets. Press Enter, scroll through them while listening to the full mix, and commit to whichever you like without ever leaving your current chain.
ARA Support: Better Plugin Integration
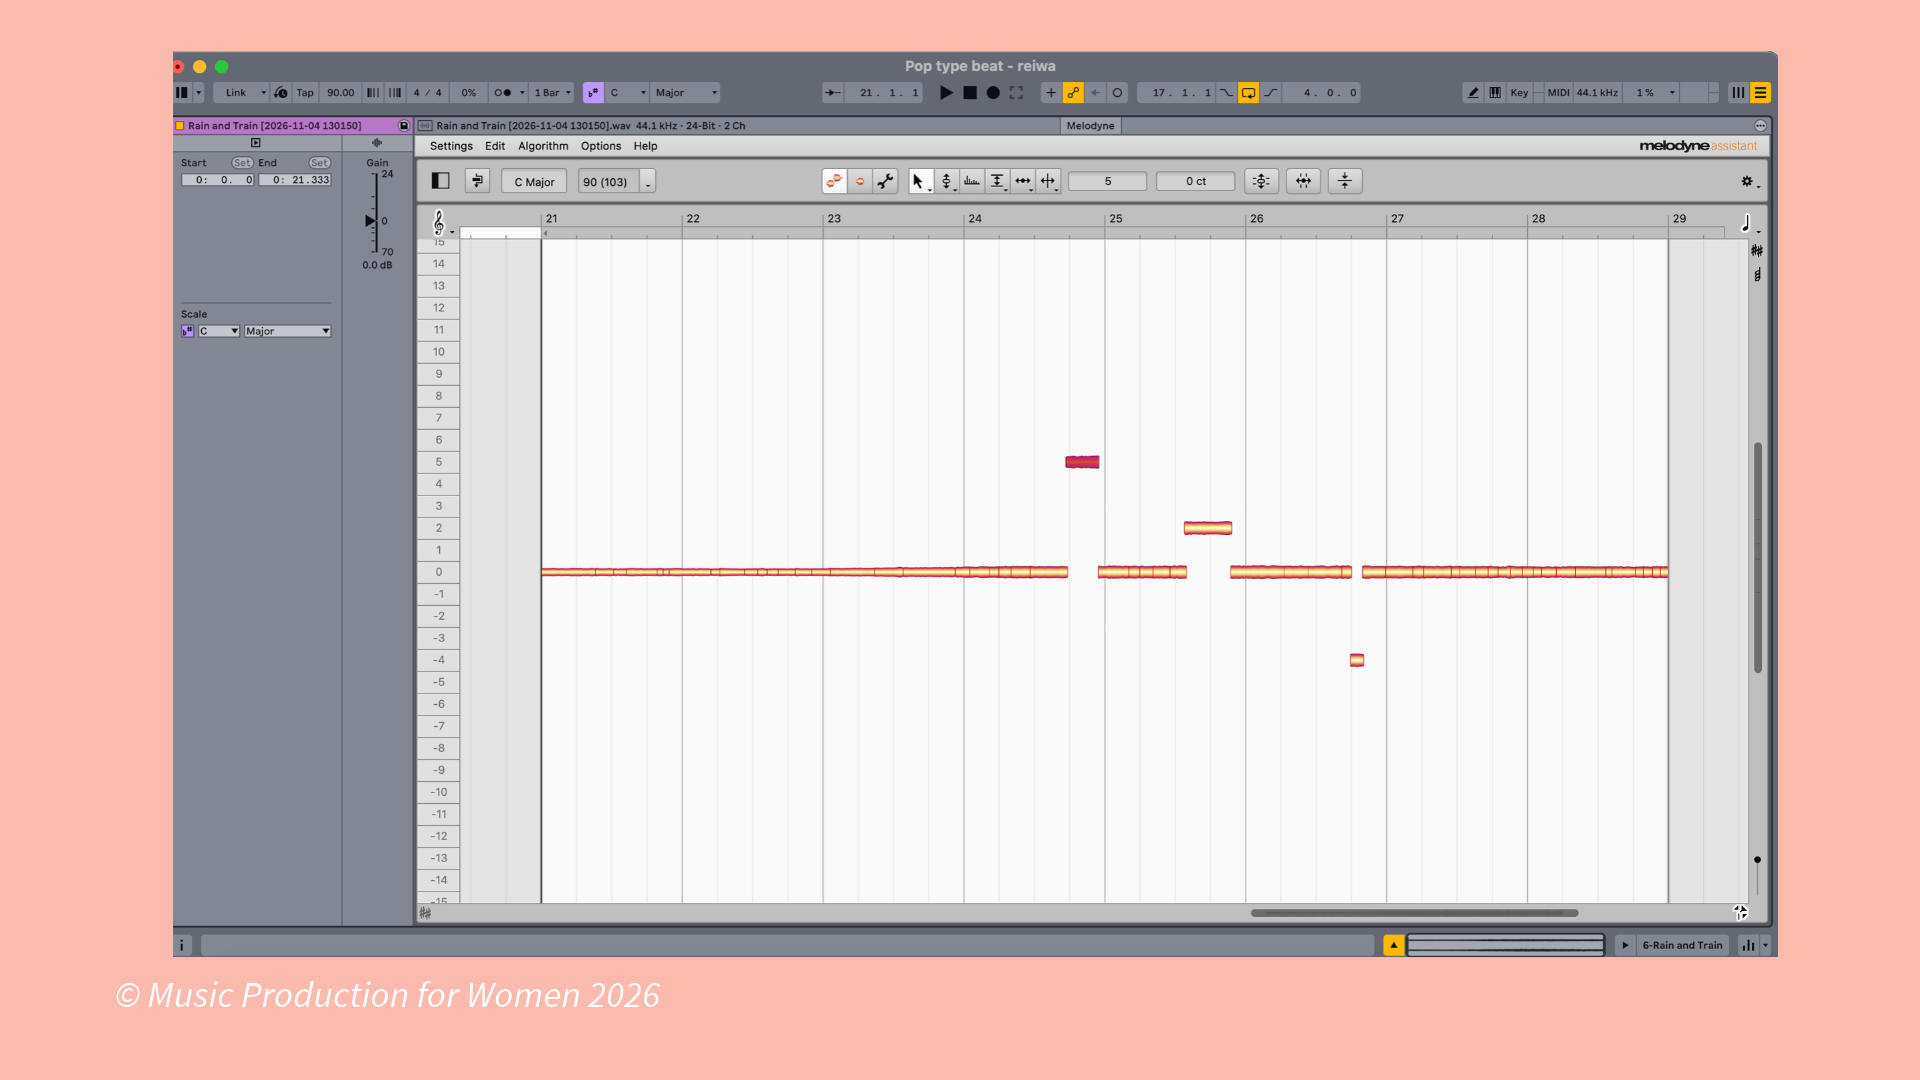
What it is: Audio Resource Exchange (ARA) is a protocol that allows plugins to integrate more deeply with DAWs. Live 13 includes an intro version of Melodyne via ARA, plus support for other compatible plugins like iZotope RX and Vocalign.
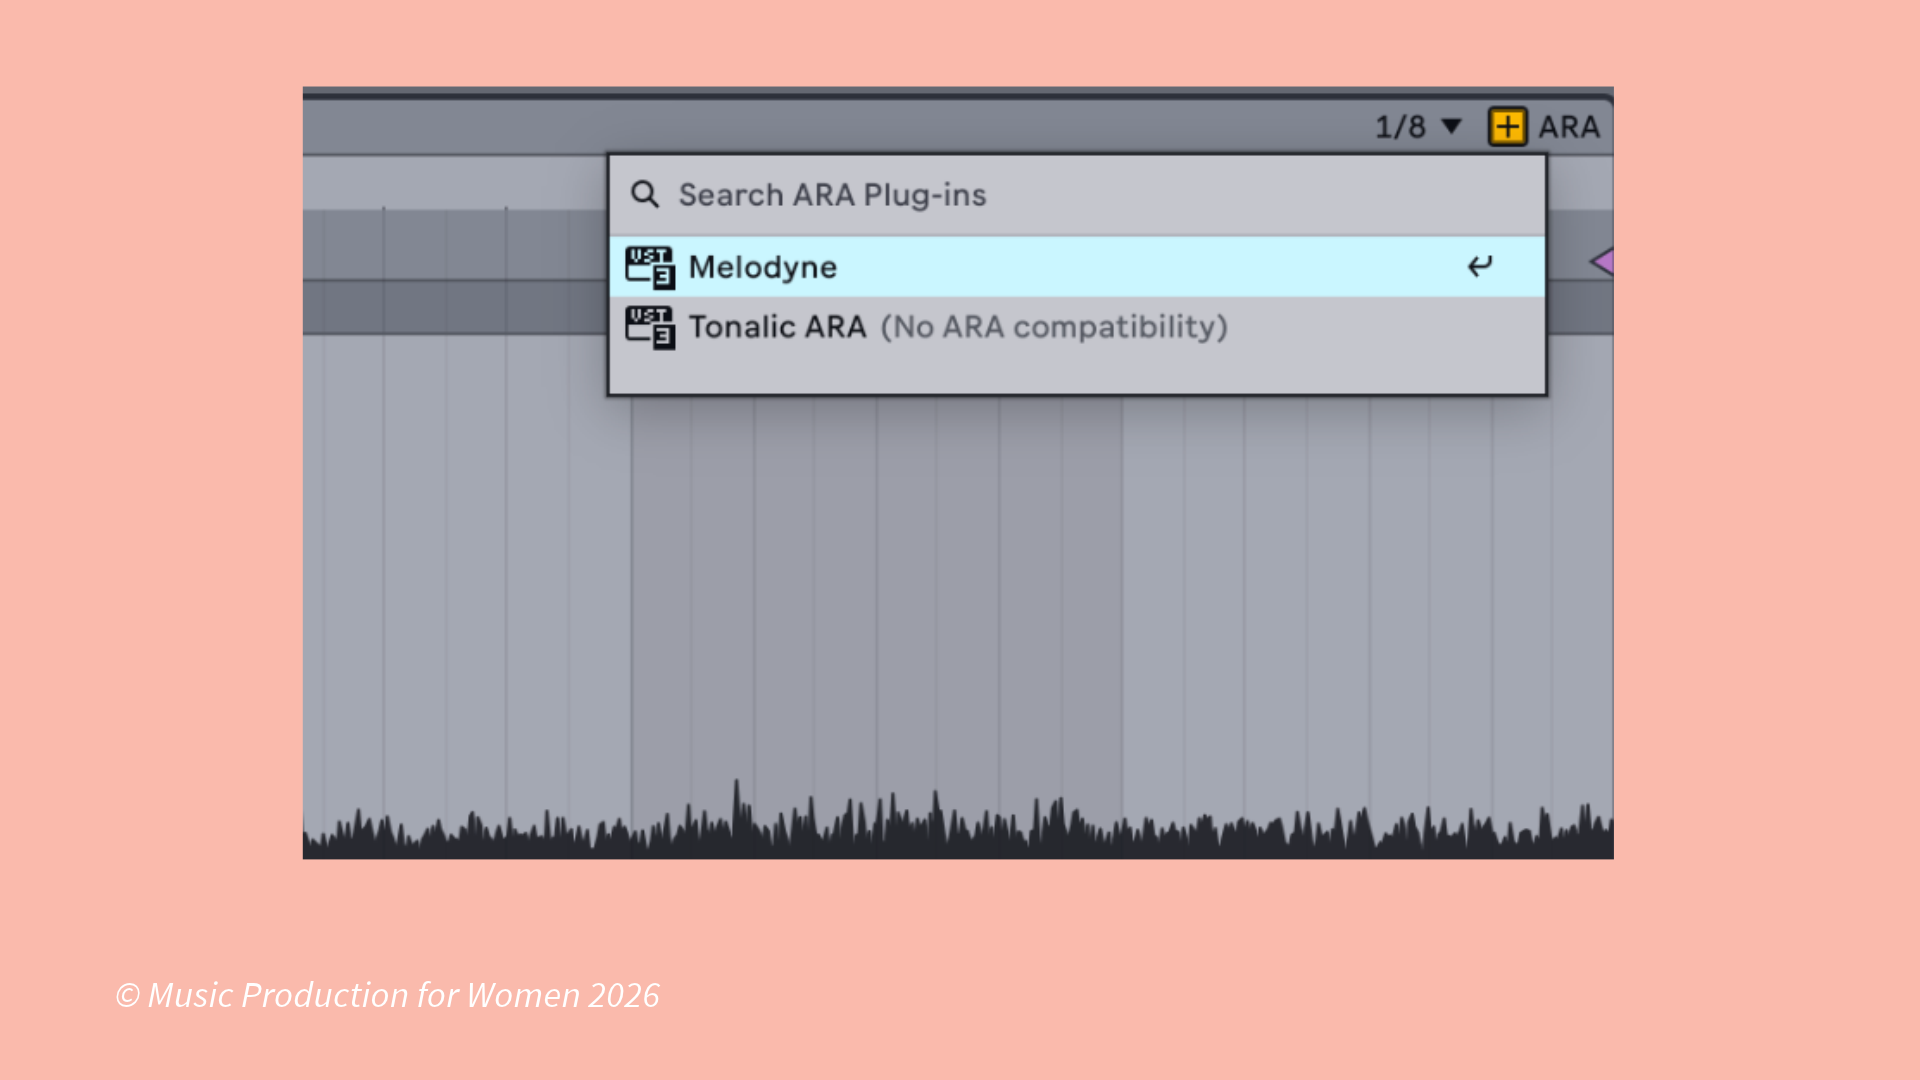
What's changed: Previously, plugin integration was limited to basic audio routing. ARA allows ARA-compatible software to communicate back and forth with your DAW so you no longer need to print, bounce, or import audio into external software (like Melodyne) every time you want to use them.
How it works: A + ARA button appears in the top-right corner of the audio clip view. Click it, select Melodyne from the dropdown menu, and start editing your audio directly within Ableton Live. No need to export or transfer your audio to another application.
Why it's useful: You no longer need to bounce your audio into an external software in order to edit, tune, or repair it. So you can edit vocals, fix pitch or repair audio without committing it to a plugin within your session. Changes are applied in real-time and are easy to revert or commit at any point.
Practical example: You've recorded a vocal that needs pitch correction but you don't want to commit the entire vocal to Melodyne yet. Load the ARA version of Melodyne on the clip of the vocal you want to tune, make your edits within Live and then bounce when you're happy with the result.
Ableton Link: Sync to Arrangement
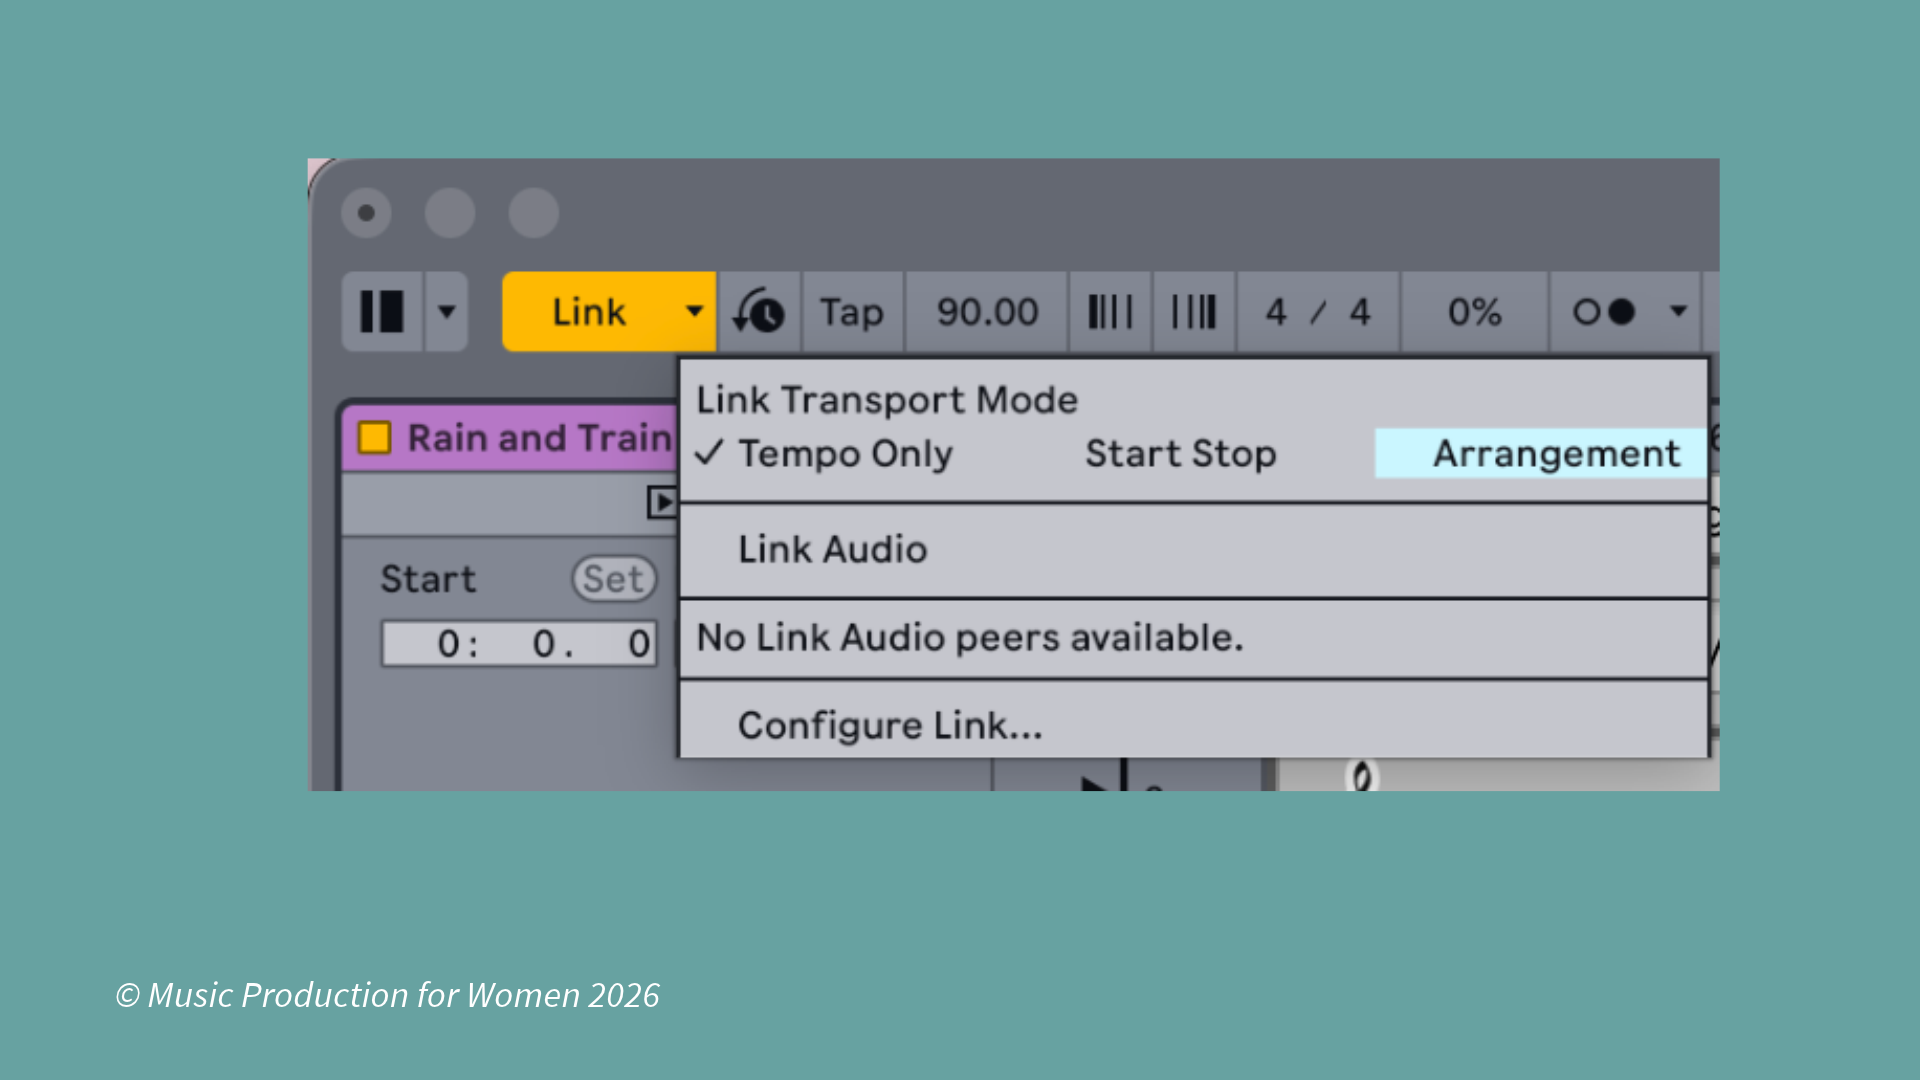
What it is: Ableton Link is the protocol that syncs multiple devices wirelessly or over a network. Live 13 adds the ability to sync Link devices to an arrangement position.
What's changed: Previously, Link would start transport on any connected device but couldn't jump to a specific position in an arrangement.
How it works: When you start playback on a Link-enabled device, it will jump to the corresponding position in your arrangement. This works for jam recordings, multi-station performances or syncing visuals to audio.
Why it's useful: While Ableton Link already keeps devices playing at the same tempo and in time, Sync to Arrangement ensures they're also following the same part of a song or performance. This means you can skip sections, restart from a specific bar or jump between different parts of your arrangement without having to manually reposition playback on every connected device.
Practical example: Imagine you're rehearsing a live show with a visual artist using a compatible application on a second computer. You decide to skip the intro and start directly from the chorus at bar 33. Instead of manually finding that position on both computers, you simply move the playhead in Live. With arrangement position sync enabled, the visual artist's playback follows the same position, keeping the visuals aligned with the correct section of your music.
MIDI Lanes: Finally Here!
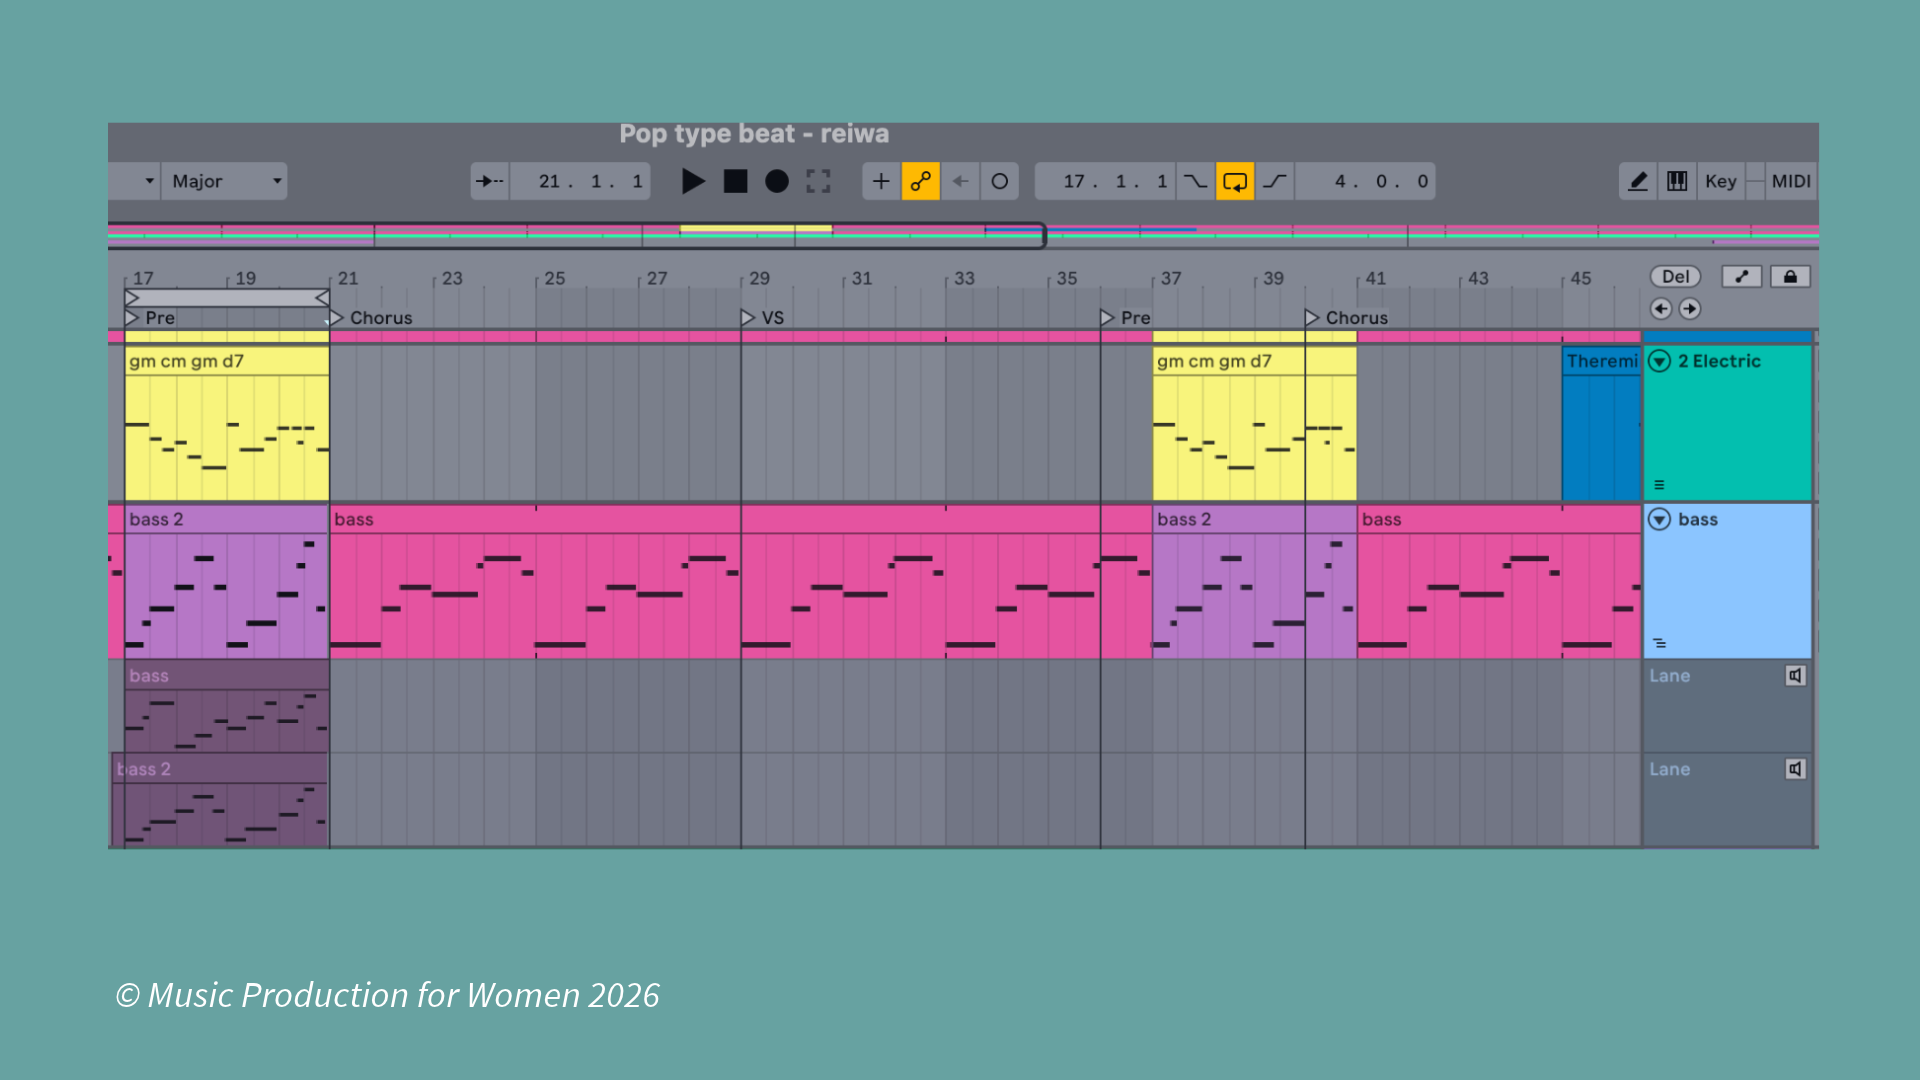
What it is: MIDI lanes let you see and edit MIDI events vertically, similar to how audio regions appear in the arrangement view.
What's changed: This is the first time MIDI lanes exist in Live, which has always shown MIDI events as horizontal clips.
How it works: In Arrangement View, click the three-line icon to show the MIDI lanes, and you'll see individual notes as horizontal bars stacked vertically. You can draw, move or delete them just like audio regions.
Why it's useful: It makes MIDI editing more intuitive, especially for complex arrangements with many instruments. You can see the full picture of your MIDI data at a glance and edit it more efficiently.
Practical example: You've recorded a piano part with 16 different notes and need to tidy up the timing. Switch on MIDI lanes, see all the notes laid out vertically, and quickly adjust any that are slightly off.
3. Other Improvements Worth Knowing About
Redesigned interface: Navigation and layout have been improved for better workflow, especially in the browser and device view.
Export Tempo Map: You can now export tempo maps for use in other DAWs or playback systems.
Prepare Scene button: A new button that stops all clips, arms a scene and moves selection to the next clear scene, designed for quick transitions in live performance.
Automation clips on return channels: You can now host automation clips over return channel regions, making it easier to automate effects in session view or create repeating patterns.
4. Availability, Compatibility and Upgrade Options
Release dates: Beta opened November 10, full release February 2027.
Editions: Most new devices are included in all editions, but some features like ARA support and certain effects may be limited to Standard or Suite depending on the specific device.
Pricing: If you already own Live 12 Suite, you can now pre-order Live 13 Suite at 20% off, you can also buy or upgrade to any edition of Live 12 at 20% off before Live 13 is released, and get the same edition of Live 13 free on release.
Project compatibility: Live 13 projects should be compatible with Live 12 and earlier versions, though some new features won't be available in older versions.
Ready to go further?
Explore MPW’s introductory music production course and learn the basics of your DAW to start turning your first sounds into finished tracks.
5. Final Thoughts
Ableton Live 13 is a solid update that balances new features with practical improvements. The Step Sequencer and MIDI lanes are probably the biggest wins for producers, while the new devices like Multiband Effect Rack and Clipper give you tools that were previously missing from Live.
If you're coming from other DAWs, the Inline Browsing and consolidated devices will feel familiar. If you're a long-time Live user, the ARA support and the new step sequencer are welcome additions that make Live work better with the rest of your setup.
The interface refresh gives it a fresh look, but it's the workflow improvements that really make this update feel worthwhile.
Which of these new features would you try first?